Repurposed Crib into Kid’s Activity Table
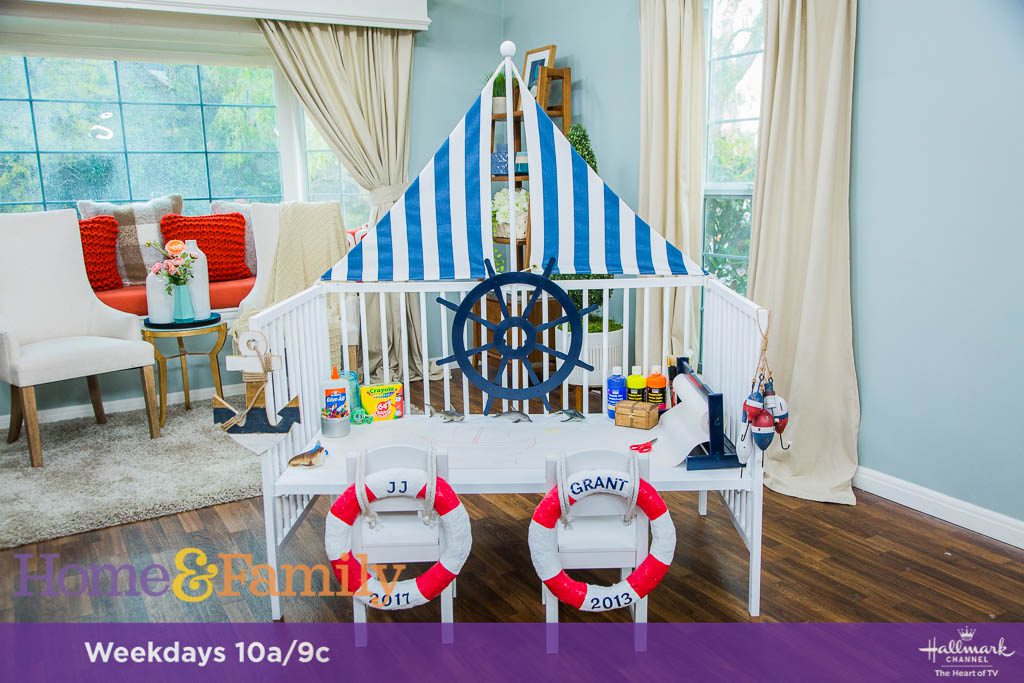
Repurposed Crib into Kid’s Activity Table
I have used the same crib for both of my kids! My baby, JJ, is only 8 months, so he will be using it for a little while to come. The thought of parting with the crib makes me sad though. I’m still not convinced that I am done having babies. My husband is completely convinced that we should be done! I am one of two kids and my husband is one of three. I just love the idea of having a full house. If you have three (or more) kids, I would love to hear your advice on how the change was when you went from two to three kids. I need leverage to talk my husband into it!!
In the meantime, I have some inspiration for those of you wanting to repurpose your crib if you are done having kids! I love the idea of holding onto the crib a bit longer and making something really fun and special with it.
You can find the complete step-out below!
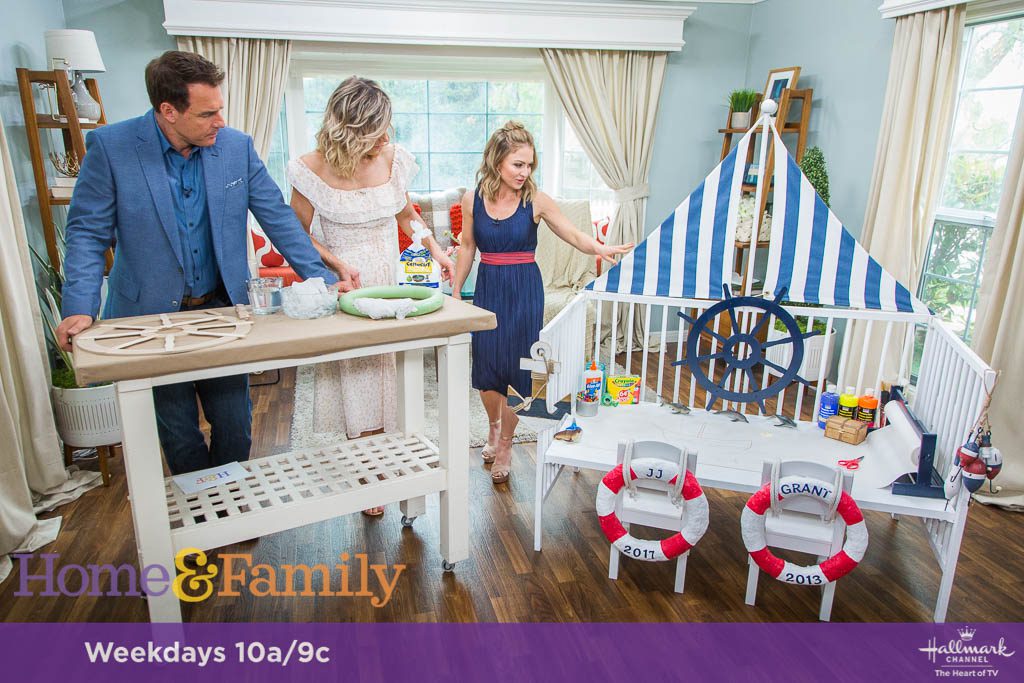
Repurposed Crib into Kid’s Activity Table
Materials for Crib
-
Crib
-
Pipe straps
-
Paint & paint brush
-
Screwdriver
Materials for Boat Steering Wheel
-
Foam floral wreath- 14 inches
-
Celluclay
-
Red paint
-
White paint
-
Paint brushes
-
Painter’s tape
-
Letter stickers; optional
-
Sand paper; optional
-
Wax paper
-
Gloves
-
Large bowl
Materials for Life Preserver
-
Craft rings – large & small
-
Glue
-
Paint sticks
-
Paint
Instructions for Crib
1. Depending on the type of crib you have unscrew one side panel off.
2. Screw in pipe straps on both sides of crib.
3. Paint entire crib white (optional).
4. Let dry.
Instructions for Steering Wheel
1. Place the wreaths onto wax paper.
2. Pour some water into the bowl.
3. With gloves on, scoop out some of the celluclay into the water; it is recommended to work in a well-ventilated space, preferably outdoors.
4. Use your hands to mix the water and the celluclay together; add in more water or more celluclay until you achieve a thick consistency that is able to stick to the foam.
5. If it is too watery then it won’t stick well, and can take a very long time to dry; if it is too thick, it will be too hard to mold nicely.
6. Have an extra bowl nearby with water in it to dip your hands in as you go; wet hands (while wearing gloves) will help to mold the clay and prevent it from sticking to your hands.
7. Once the entire wreath is covered in the celluclay, dip your glove-covered hands in water, and smooth the celluclay so that it looks rounded and even.
8. Allow the mold to dry completely; this can take a while, even up to 24 hours.
9. Once dry, use sand paper, if needed, to smooth out any areas that need it.
10. Paint the circle white.
11. Once completely dry, paint four separate areas red; it helps to use painters tape to create smooth lines.
12. Allow to dry.
13. Add your child’s name to the top with either paint or stickers; optional.
Instructions to Life Preserver
1. Place the smaller craft ring in the center of the larger craft ring.
2. Glue the paint sticks to the smaller and larger ones to create the classic steering wheel look.
3. Paint the wheel white; allow to dry completely before adding it to the crib.