DIY Pie Garlands and Placemats
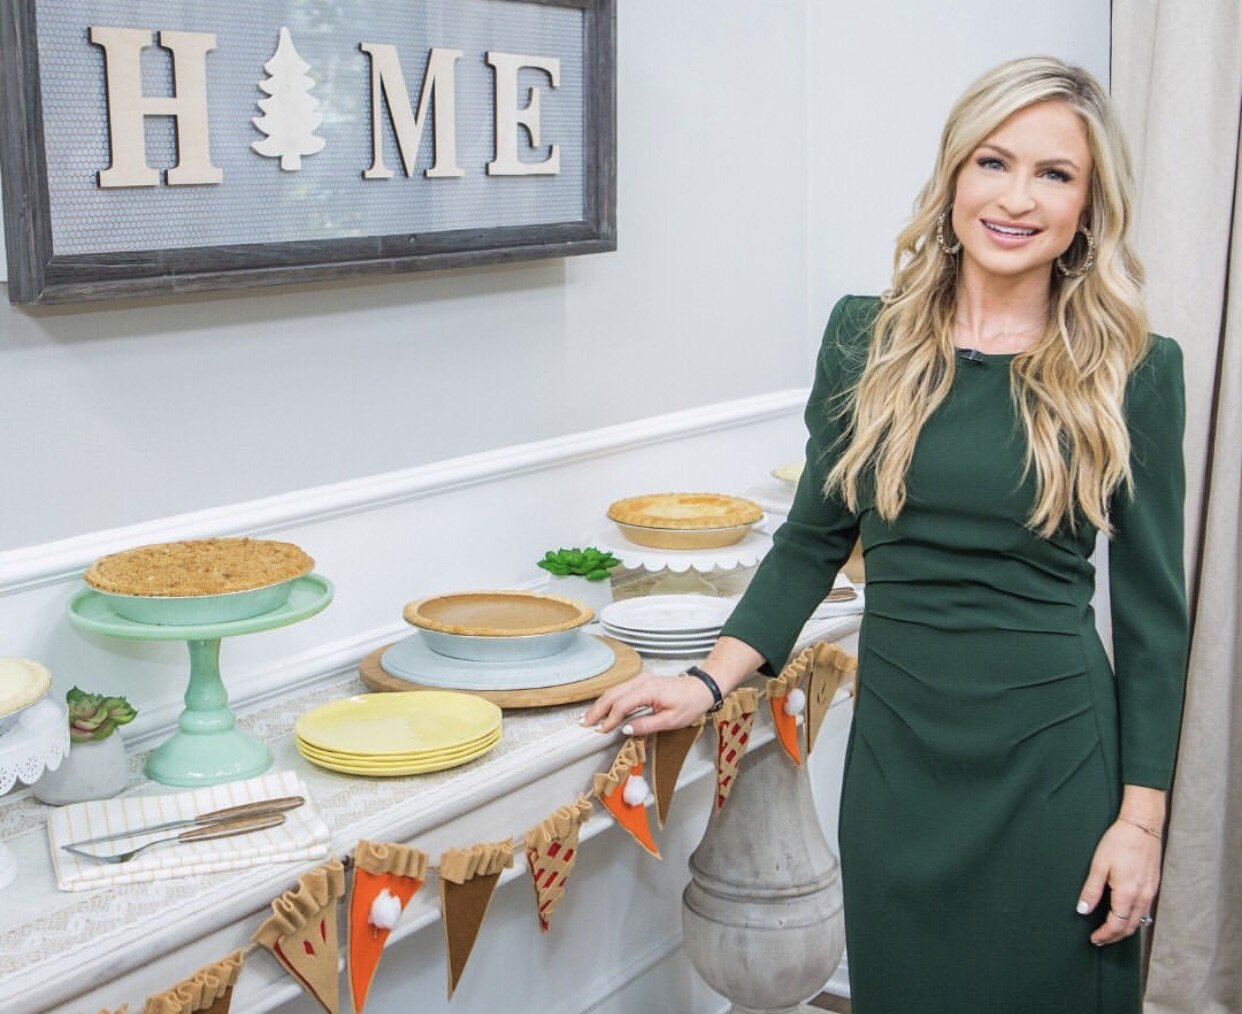
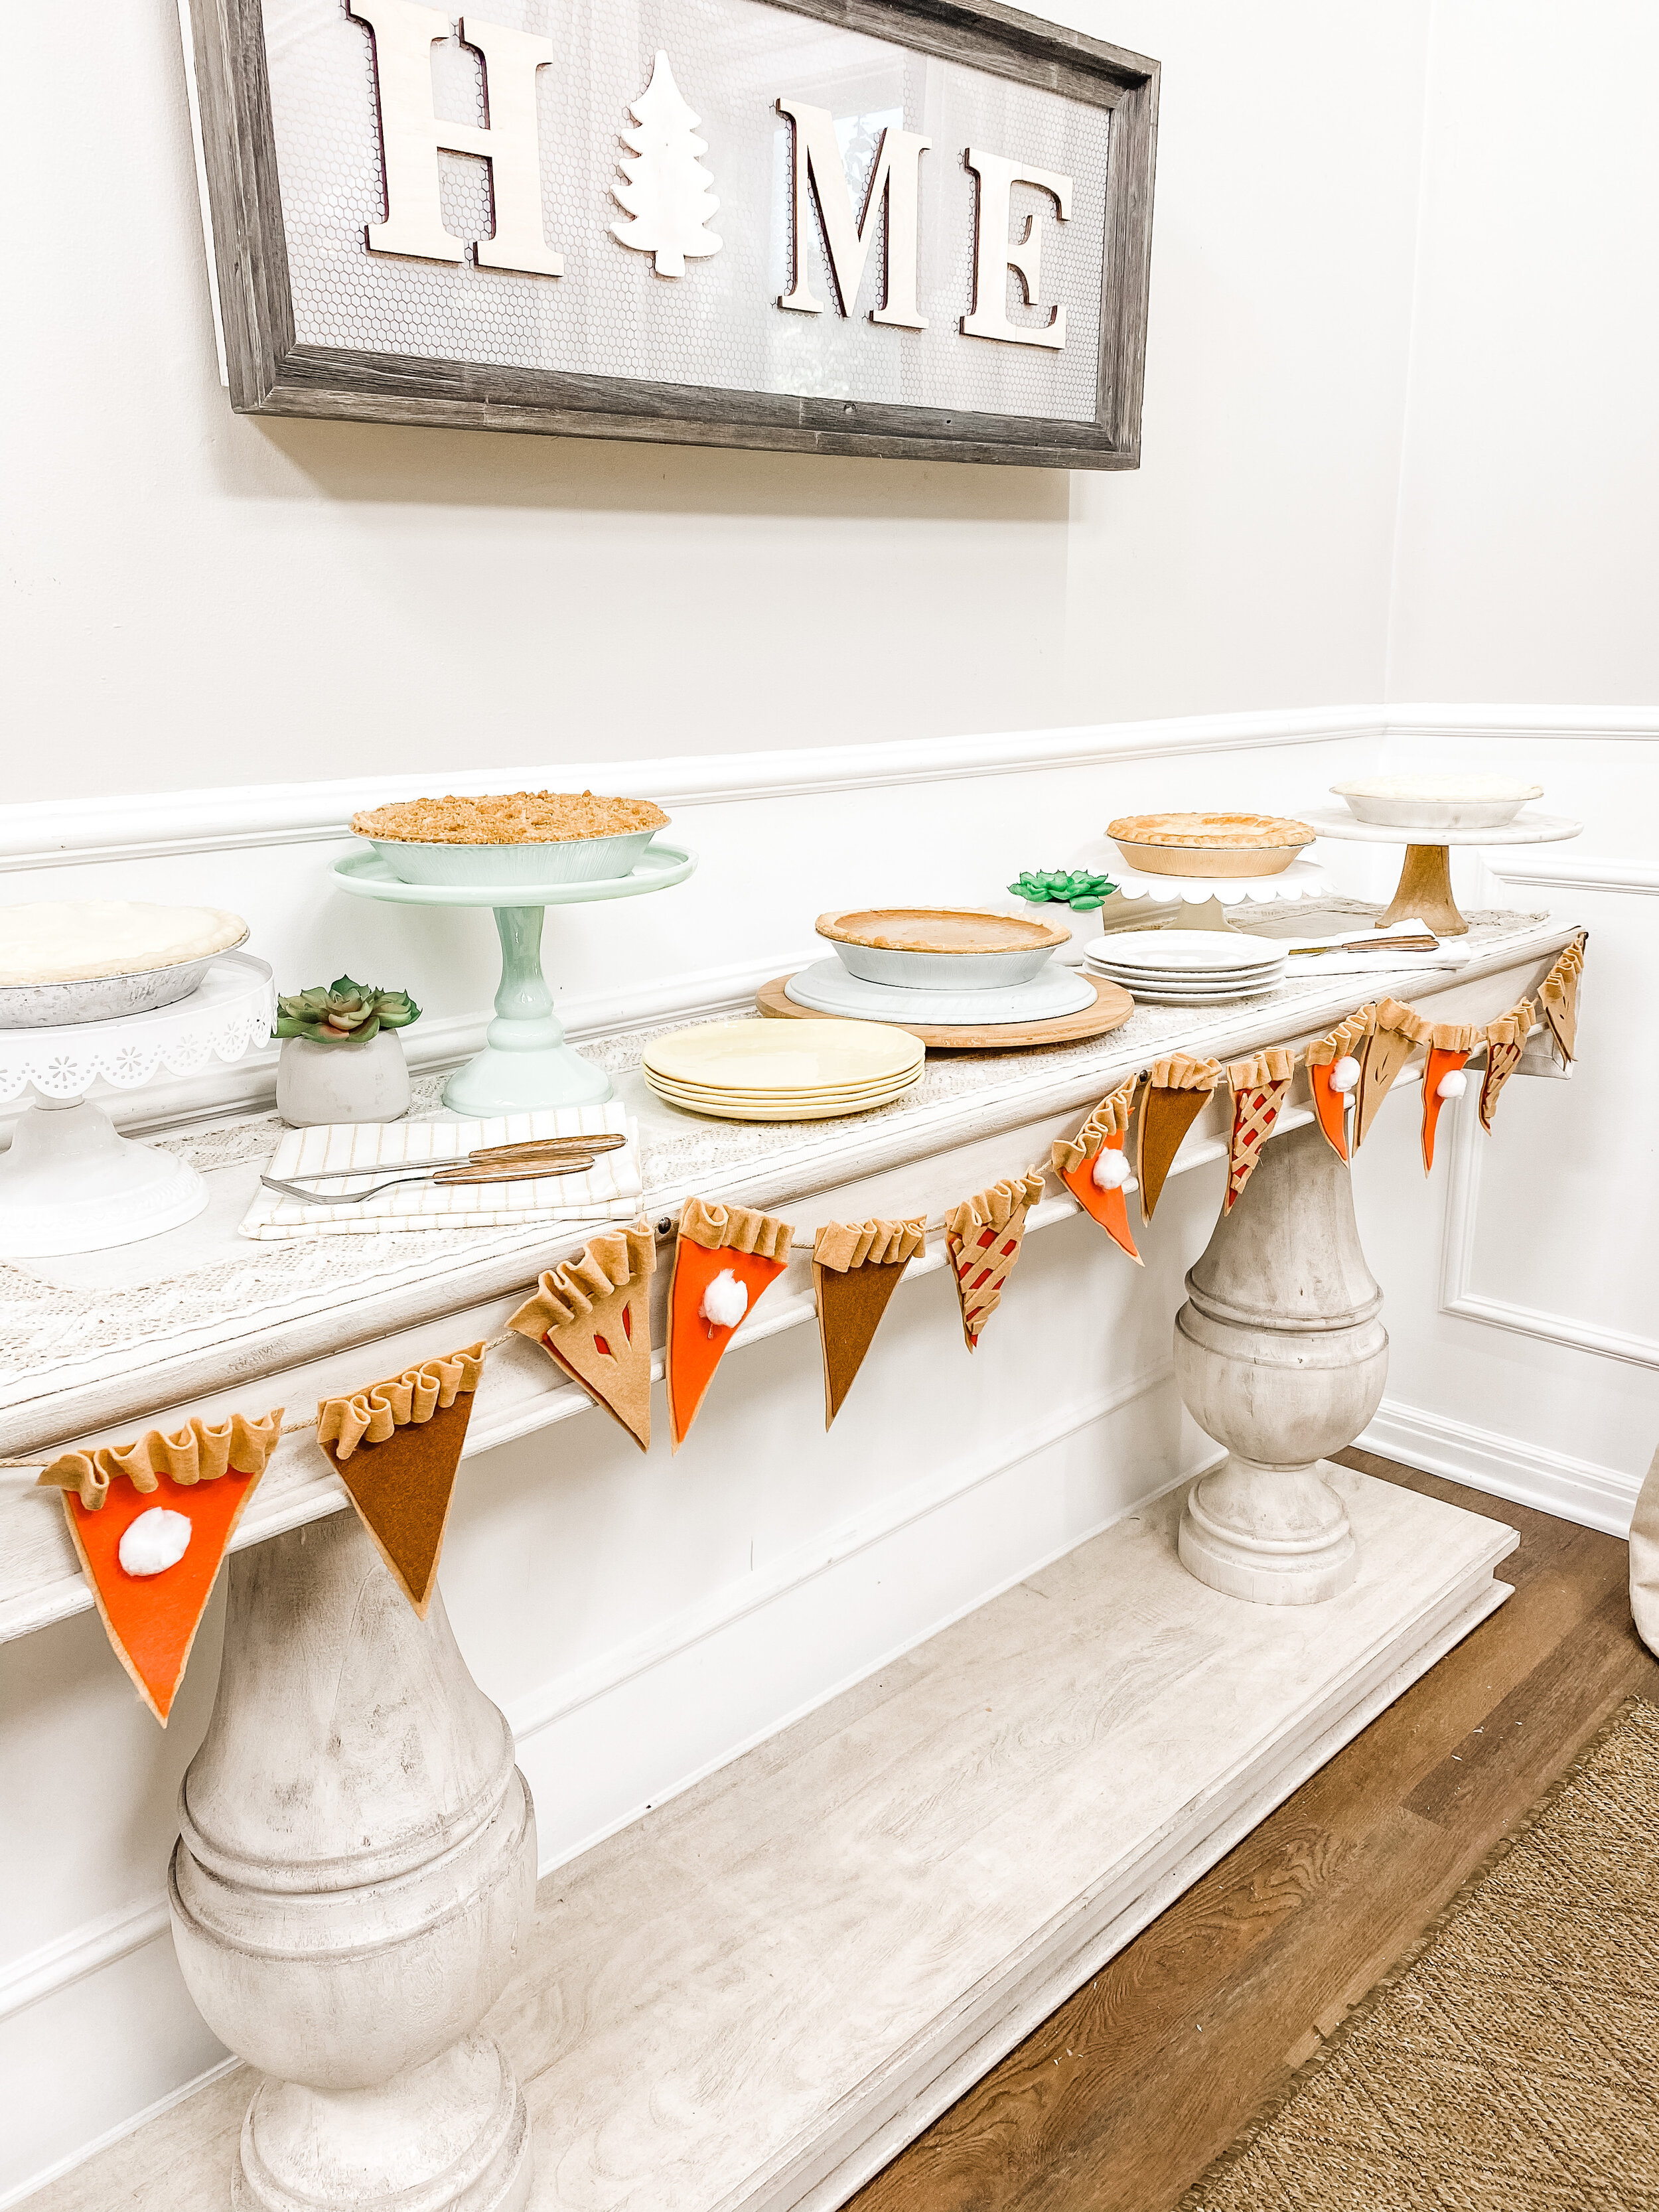
I know that the turkey and side dishes get all the attention on Thanksgiving, but I am here for the pie!! This DIY Pie Garland is such a cute way to decorate your dessert table and celebrate PIE!! I also thought that it would be fun to add some DIY Pie Placemats onto the table as well. It’s a good way to transition your table to “dessert time!”
DIY PIE GARLAND AND PLACEMATS MATERIALS:
- Felt in tan, orange, brown and any other desired “pie” colors
- White pom-poms
- Fabric marker or chalk
- Rotary cutter
- Fabric scissors
- Hot glue gun and glue sticks
- Ruler
- Twine
- Two circular objects to trace, one 1” smaller than the other
INSTRUCTIONS:
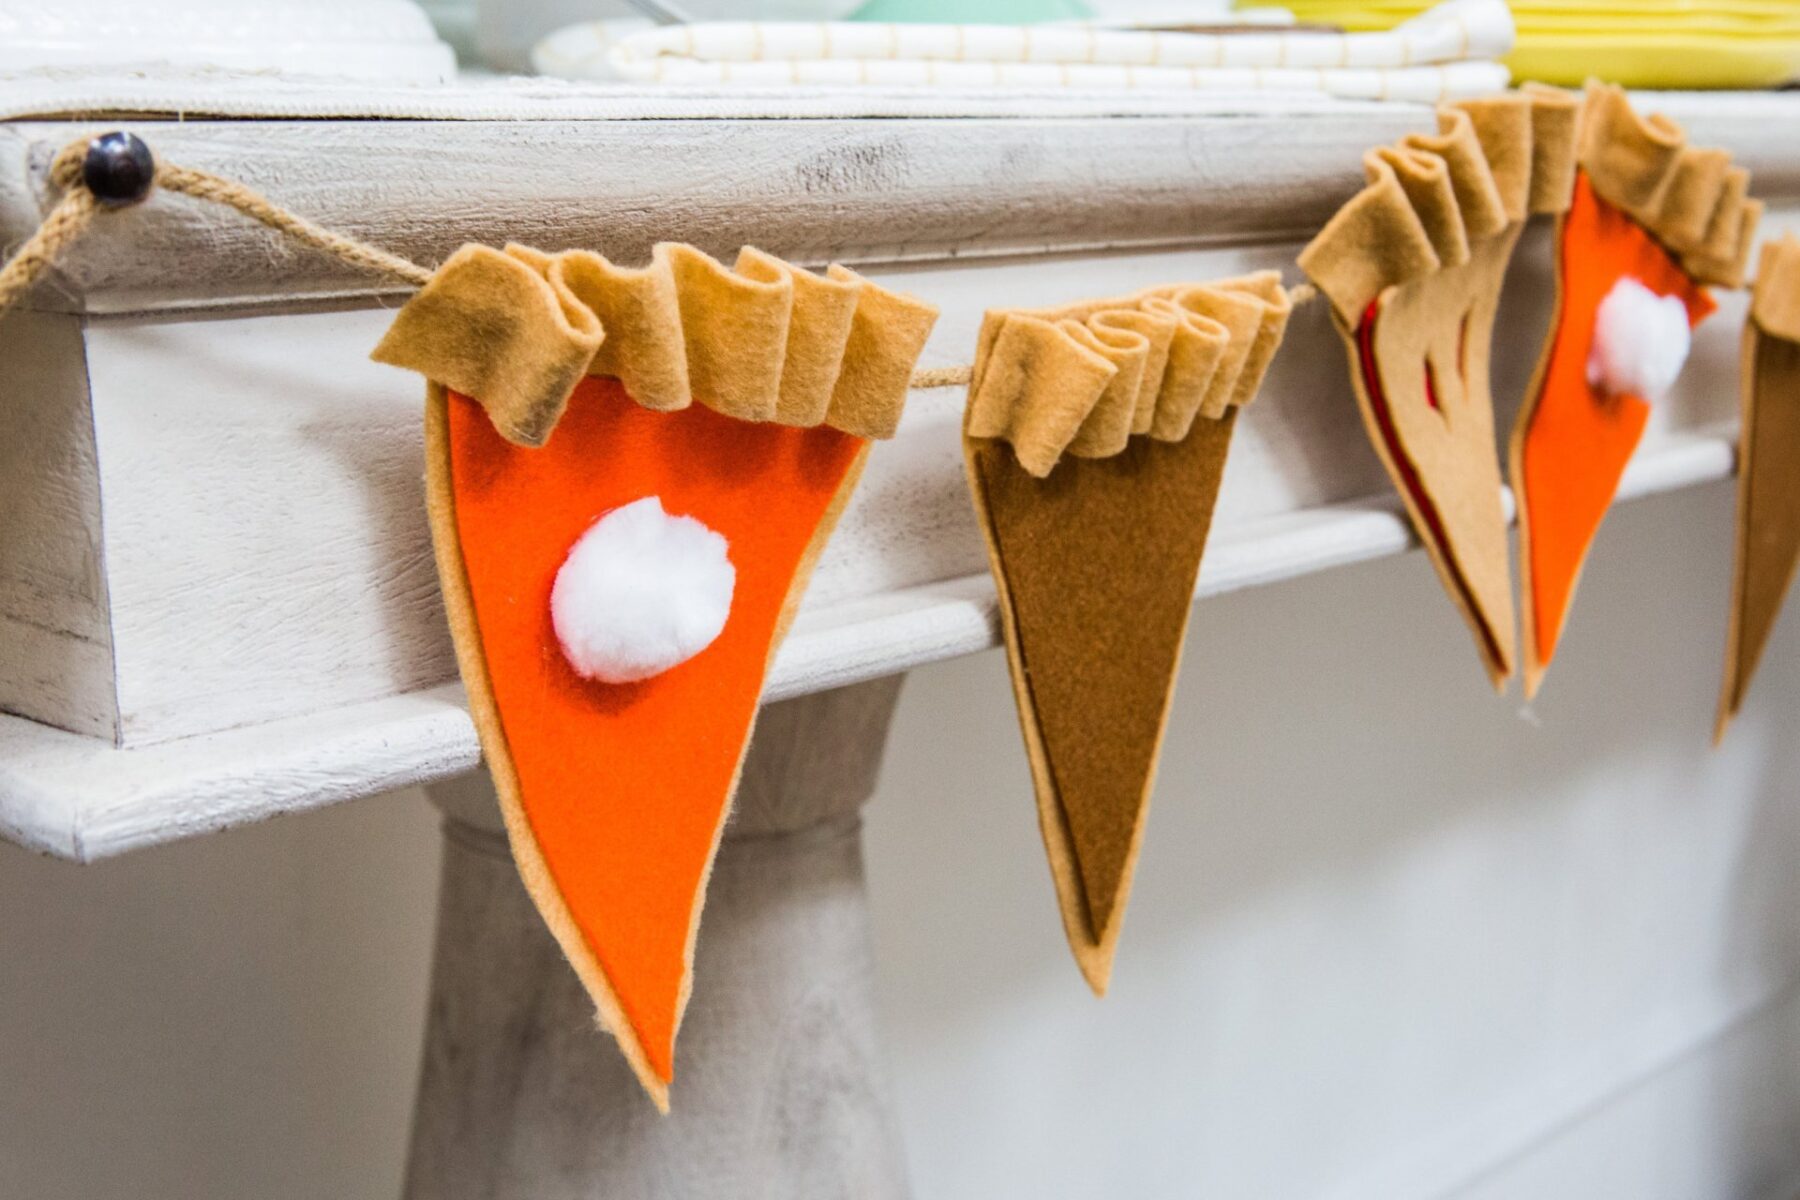
TO CREATE THE PIE GARLAND:
- For the crust, cut a bunch of rectangles out of tan felt. 4” x 6” is a good size.
- Cut the crust into a slice shape. Fold each rectangle in half and from about 1” down from the top edge, line up a ruler from the outer edge to the folded bottom point. Cut the diagonal to the bottom point of the fold with the rotary cutter along the edge of the ruler.
- Cut the “filling” out of a colorful piece of felt for each slice. This piece should be 1” shorter so that you have room for the edge of the crust. Cut as many as needed. PRO TIP: create a template to trace so you don’t have to measure each piece.
- Glue the filling to the triangular part of the crust.
- Create the scalloped crust. Cut 1” strips of tan that are double the width of the top of the slices, as many as you have pieces of pie. Adhere the crust, to make the scalloped effect, glue a portion down, fold the strip a bit to create an arch, glue down at the end of the arch, repeat until you’ve adhered the entire crust. Repeat on each slice.
- If you want to make some pie slices that are covered in a lattice crust or covered in a vented crust, cut and glue those pieces of tan over the top of the filling piece on each slice.
- For the pumpkin pie, glue a white pom-pom onto the filling as the whipped cream.
- Cut a piece of twine to desired length of garland and adhere the pie slices to it with even spacing.
- Hang the garland and enjoy!
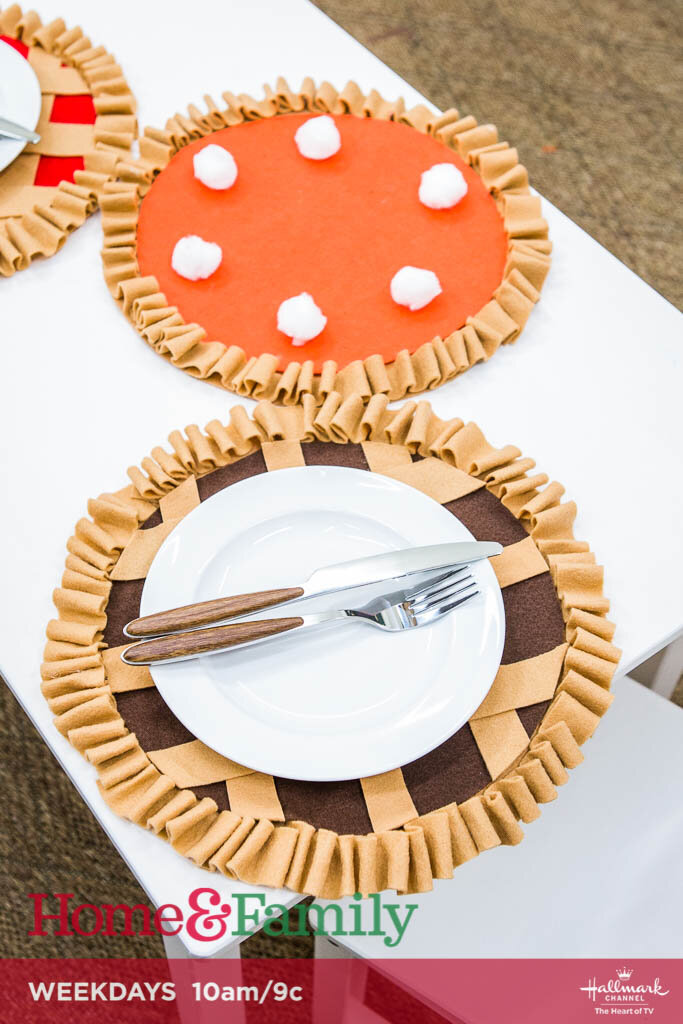
TO CREATE THE PIE PLACEMATS:
- Trace a large circle onto the tan felt and cut out with fabric scissors.
- Trace preferably 1” smaller of a circle than the crust onto the pie filling felt and cut out.
- Glue the filling felt to the center of the crust felt.
- If you want to add the lattice crust or vented crust on top of the filling, cut out of tan felt and glue to adhere.
- Cut a 1” wide strip of tan that is double the circumference of the bigger circle.
- To create the scalloped crust effect, glue a portion down, fold the strip a bit to create an arch, glue down at the end of the arch, repeat until you’ve adhered the entire crust. Do this all the way around the edge. Cut any away excess.
- Repeat steps 1-6 to create as many placemats as you need, set the table and enjoy!