Easy and Creative DIY Valentines
I love Valentine’s Day! I just love love! Seriously though! I think people get so caught up in having a significant other to celebrate with, but I think you can celebrate your love for anyone and everyone in your life in Valentine’s Day. With that being said, I have a few really cute DIYs that would be the perfect gift to celebrate love…and sweets. These little crafty treats are so fun for kids in school but also as little gifts for co-workers, grandparents, girlfriends, anyone!
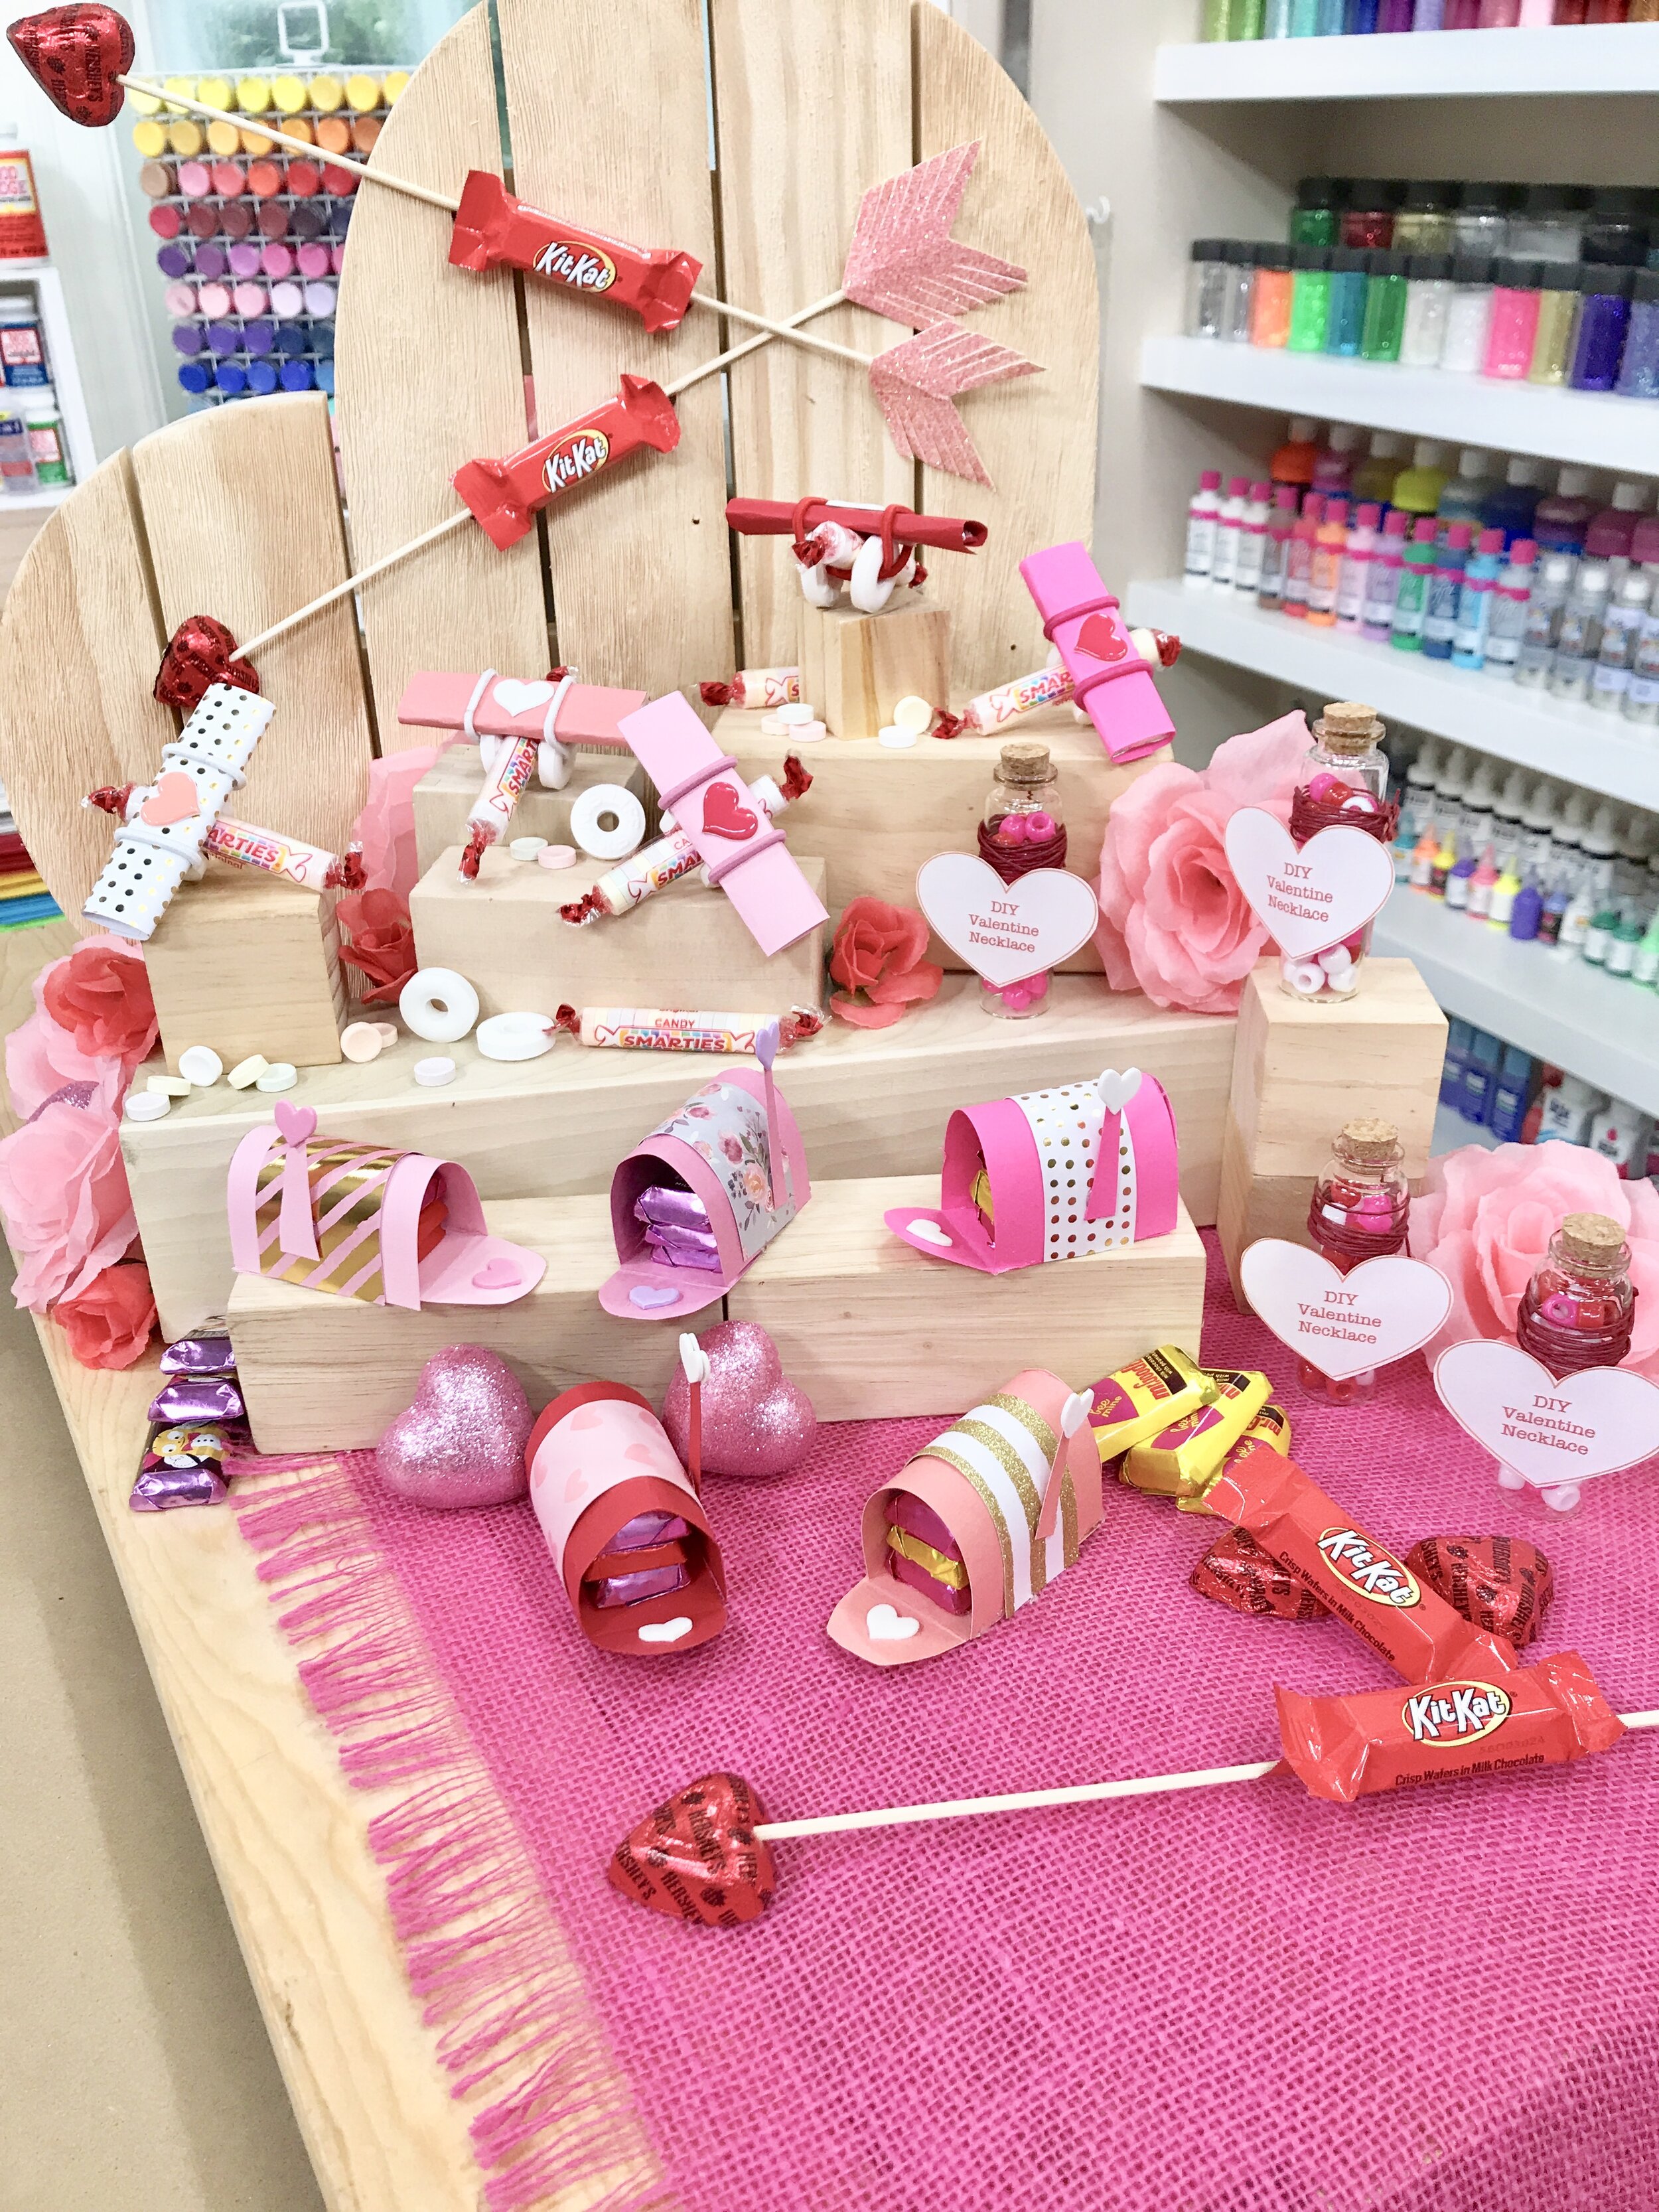
Materials and Ingredients for Candy Airplanes
-
Hair tie
-
Gum
-
Smarties
-
Mints
-
Heart Stickers
Materials and Ingredients for Candy Arrows
-
Kabob Skewers (or a dowel)
-
Chocolate Hearts
-
Mini Kit Kats
Directions for Candy Airplanes
1. The first step you’re going to do is take 2 pieces of gum and wrap scrapbook paper around the gum pieces.
2. Then you’re going to take a hair tie & string it through 2 circular mints.
3. Set your Smarties candy in the middle of the 2 mints.
4. Flip the hair tie over the wings aka the gum piece.
5. Then just for a final touch put a little heart sticker on the top!
Directions for Candy Arrows
1. Take your mini kit kats & lift up the tab of the wrapper & tape the skewer to the inside.
2. Now just for extra security, you can just dab a little hot glue on the end to make sure it doesn’t fall apart.
3. Then on the side with the point literally stick the point right into a chocolate heart.
4. Create feathers for the backside from scrapbook paper.
5. Hot glue feathers onto the back & ta-da!

Materials for Chocolate Mailbox
-
scrapbook paper or cardstock
-
scissors
-
glue gun
-
rectangle shape chocolate
-
tape
-
mini rubber band; optional
Materials for Valentines Necklace Kits
-
Glass bottle
-
Beads
-
Waxed Cotton Cord Thread
-
Tag
Directions for Chocolate Mailbox
1. Attach two or three of the chocolates together either with tape or the mini rubber band.
2. Measure out the bottom piece of paper so that it fits the size of the chocolate and about an inch longer on one end.
3. Round the edges on one end to create the mailbox look.
4. Fold the paper where the length of the chocolate ends; this will create the look of the mailbox being open.
5. Cut a piece of paper into a rectangle that fits over the chocolate to create the top of the mailbox secure this with hot glue.
6. Cut a piece of paper to fit the size of the back of the mailbox and attach with hot glue.
7. Add fun details to make it extra special like hearts, another layer of paper on the top, a piece of paper on the side to make it look like the flag on the mailbox.
Tip: Tape helps to hold the paper in place if you are having problems with it moving
Download the Valentine Necklace Design
Directions for Necklace Kits
1. Take your glass bottle & fill it up with the beads of your choice.
2. Then take waxed cotton cord & measure out how long you’d like your necklace to be.
3. Take your string & wrap it around your bottle.
4. Add a tag on the string for a final touch!


cool and createive ideas great job!