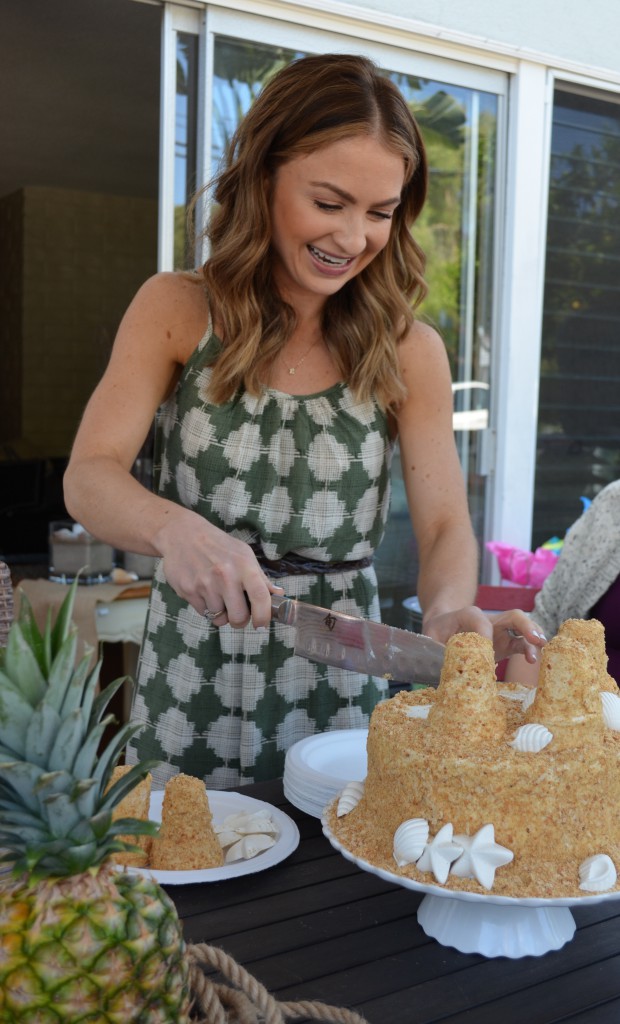
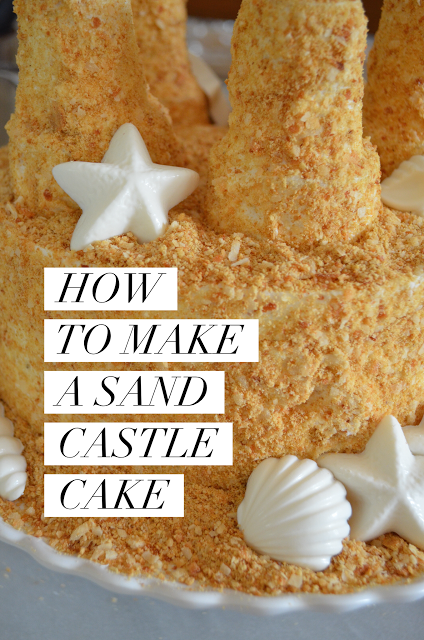
How To Make A Sandcastle Cake

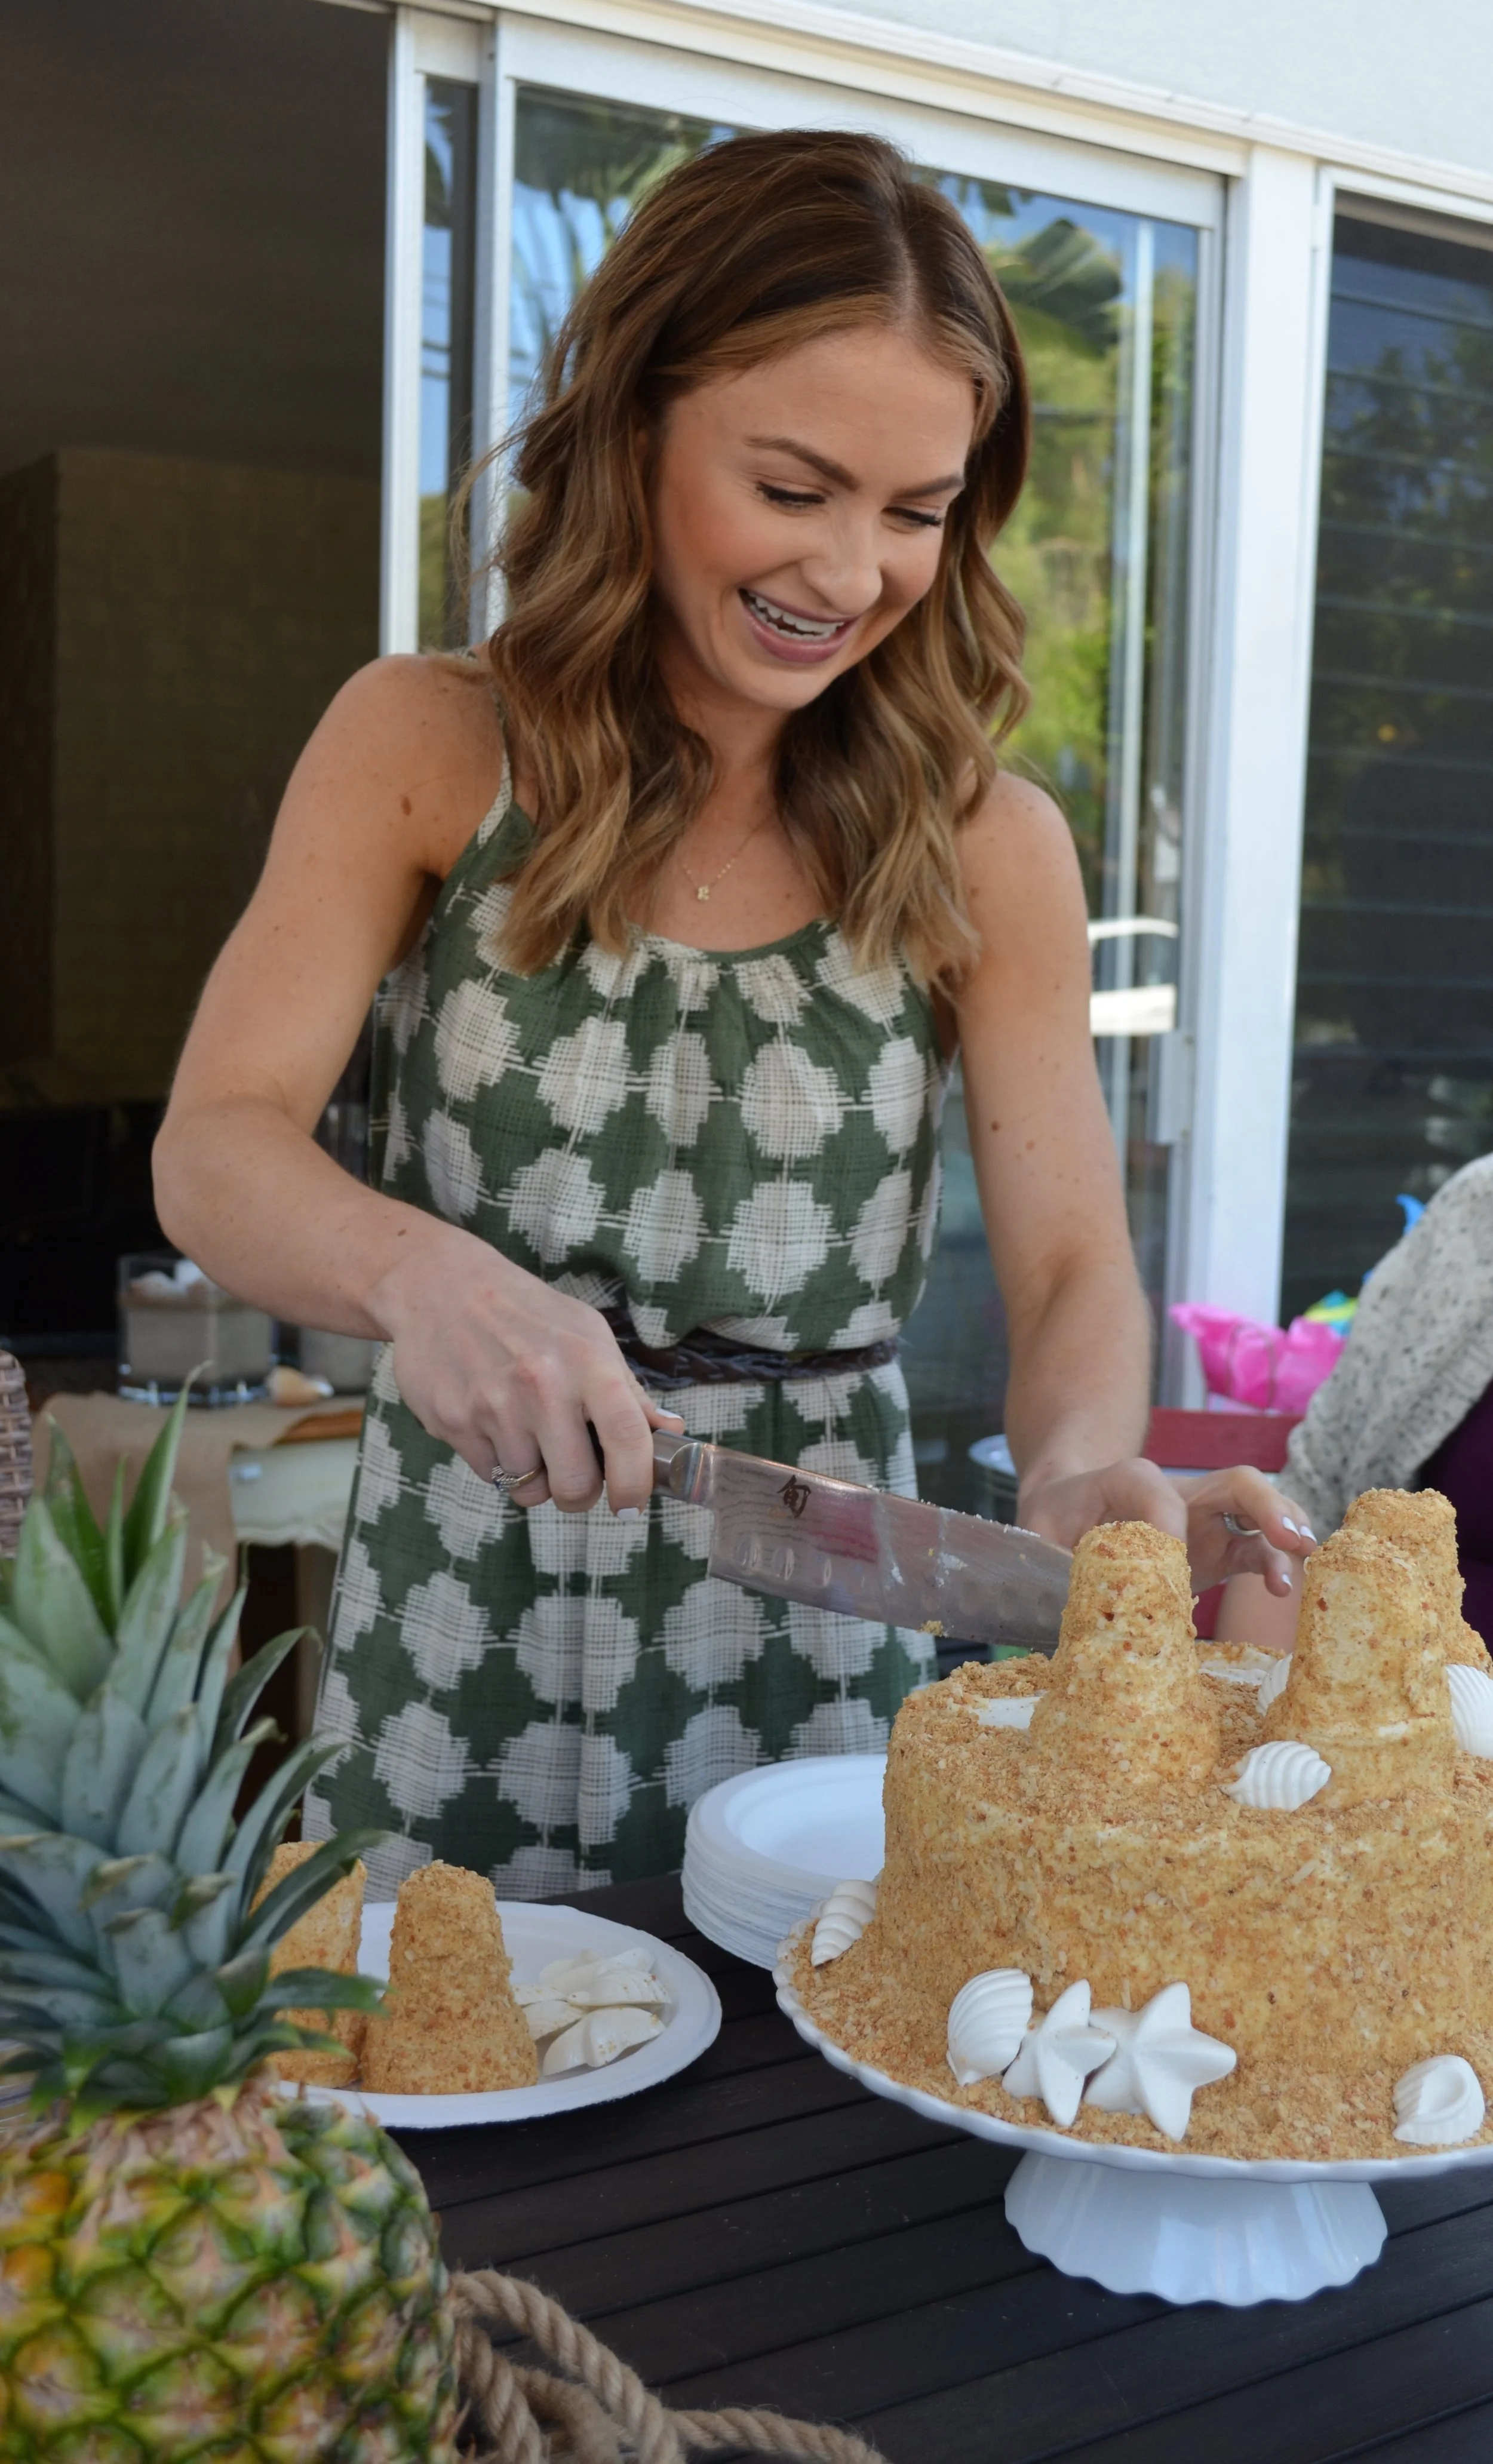
Baking is one of my absolute favorite things to do! It is such a fun way to be creative AND eat your creation. When I got together with a few friends to plan a baby shower, I knew I wanted to do a beach theme. It would be a fun way to celebrate our friends who were having summer babies. We live close to the beach in the South Bay, just outside the city of Los Angeles, so the beach is a huge part of our lives, and entertaining our kids. It was a perfect theme! Since I love to make cakes for every occasion, I wanted to make something really fun for our friends. A sand castle cake went perfect with the theme, and to be honest, it is also very easy.
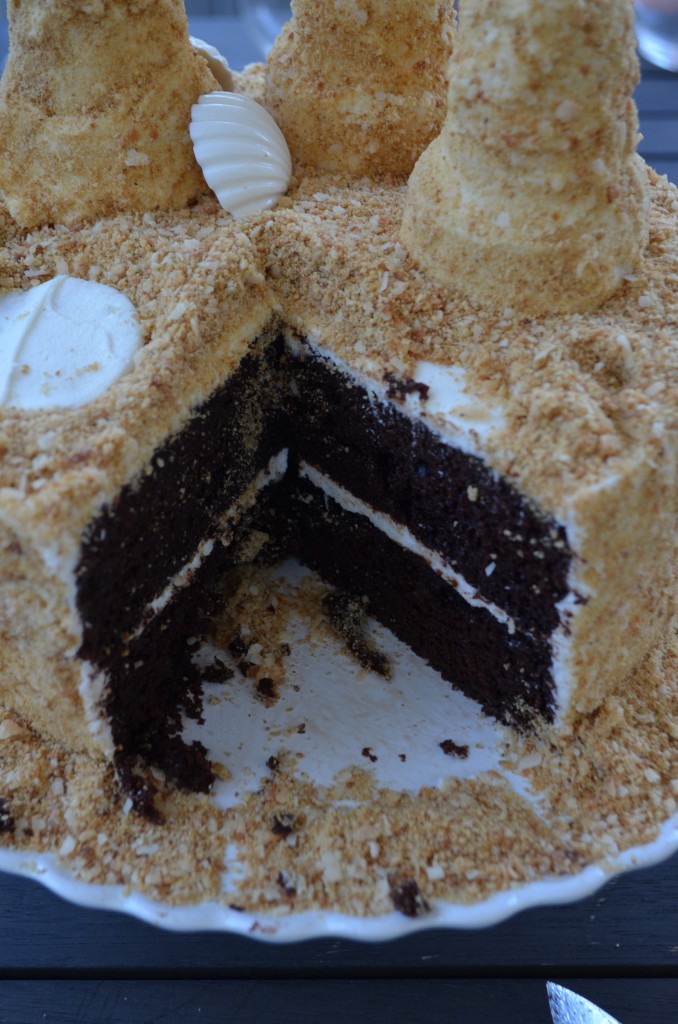
I know it looks like it can be difficult to make, similar to the chocolate construction cake I made for Grant’s birthday. The thing is, when cakes are covered with the “sand” or the “dirt,” it is actually so much easier than trying to make buttercream icing look smooth and pretty. The trick is to have the timing right on everything, and you are good to go!
Tips for making a Sand Castle Cake
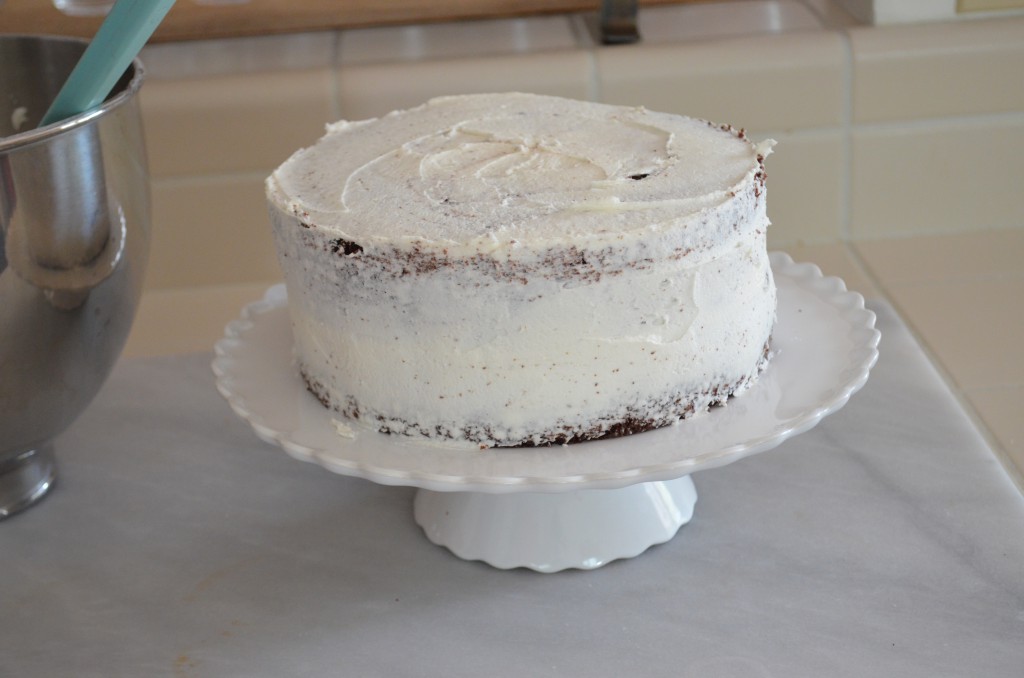
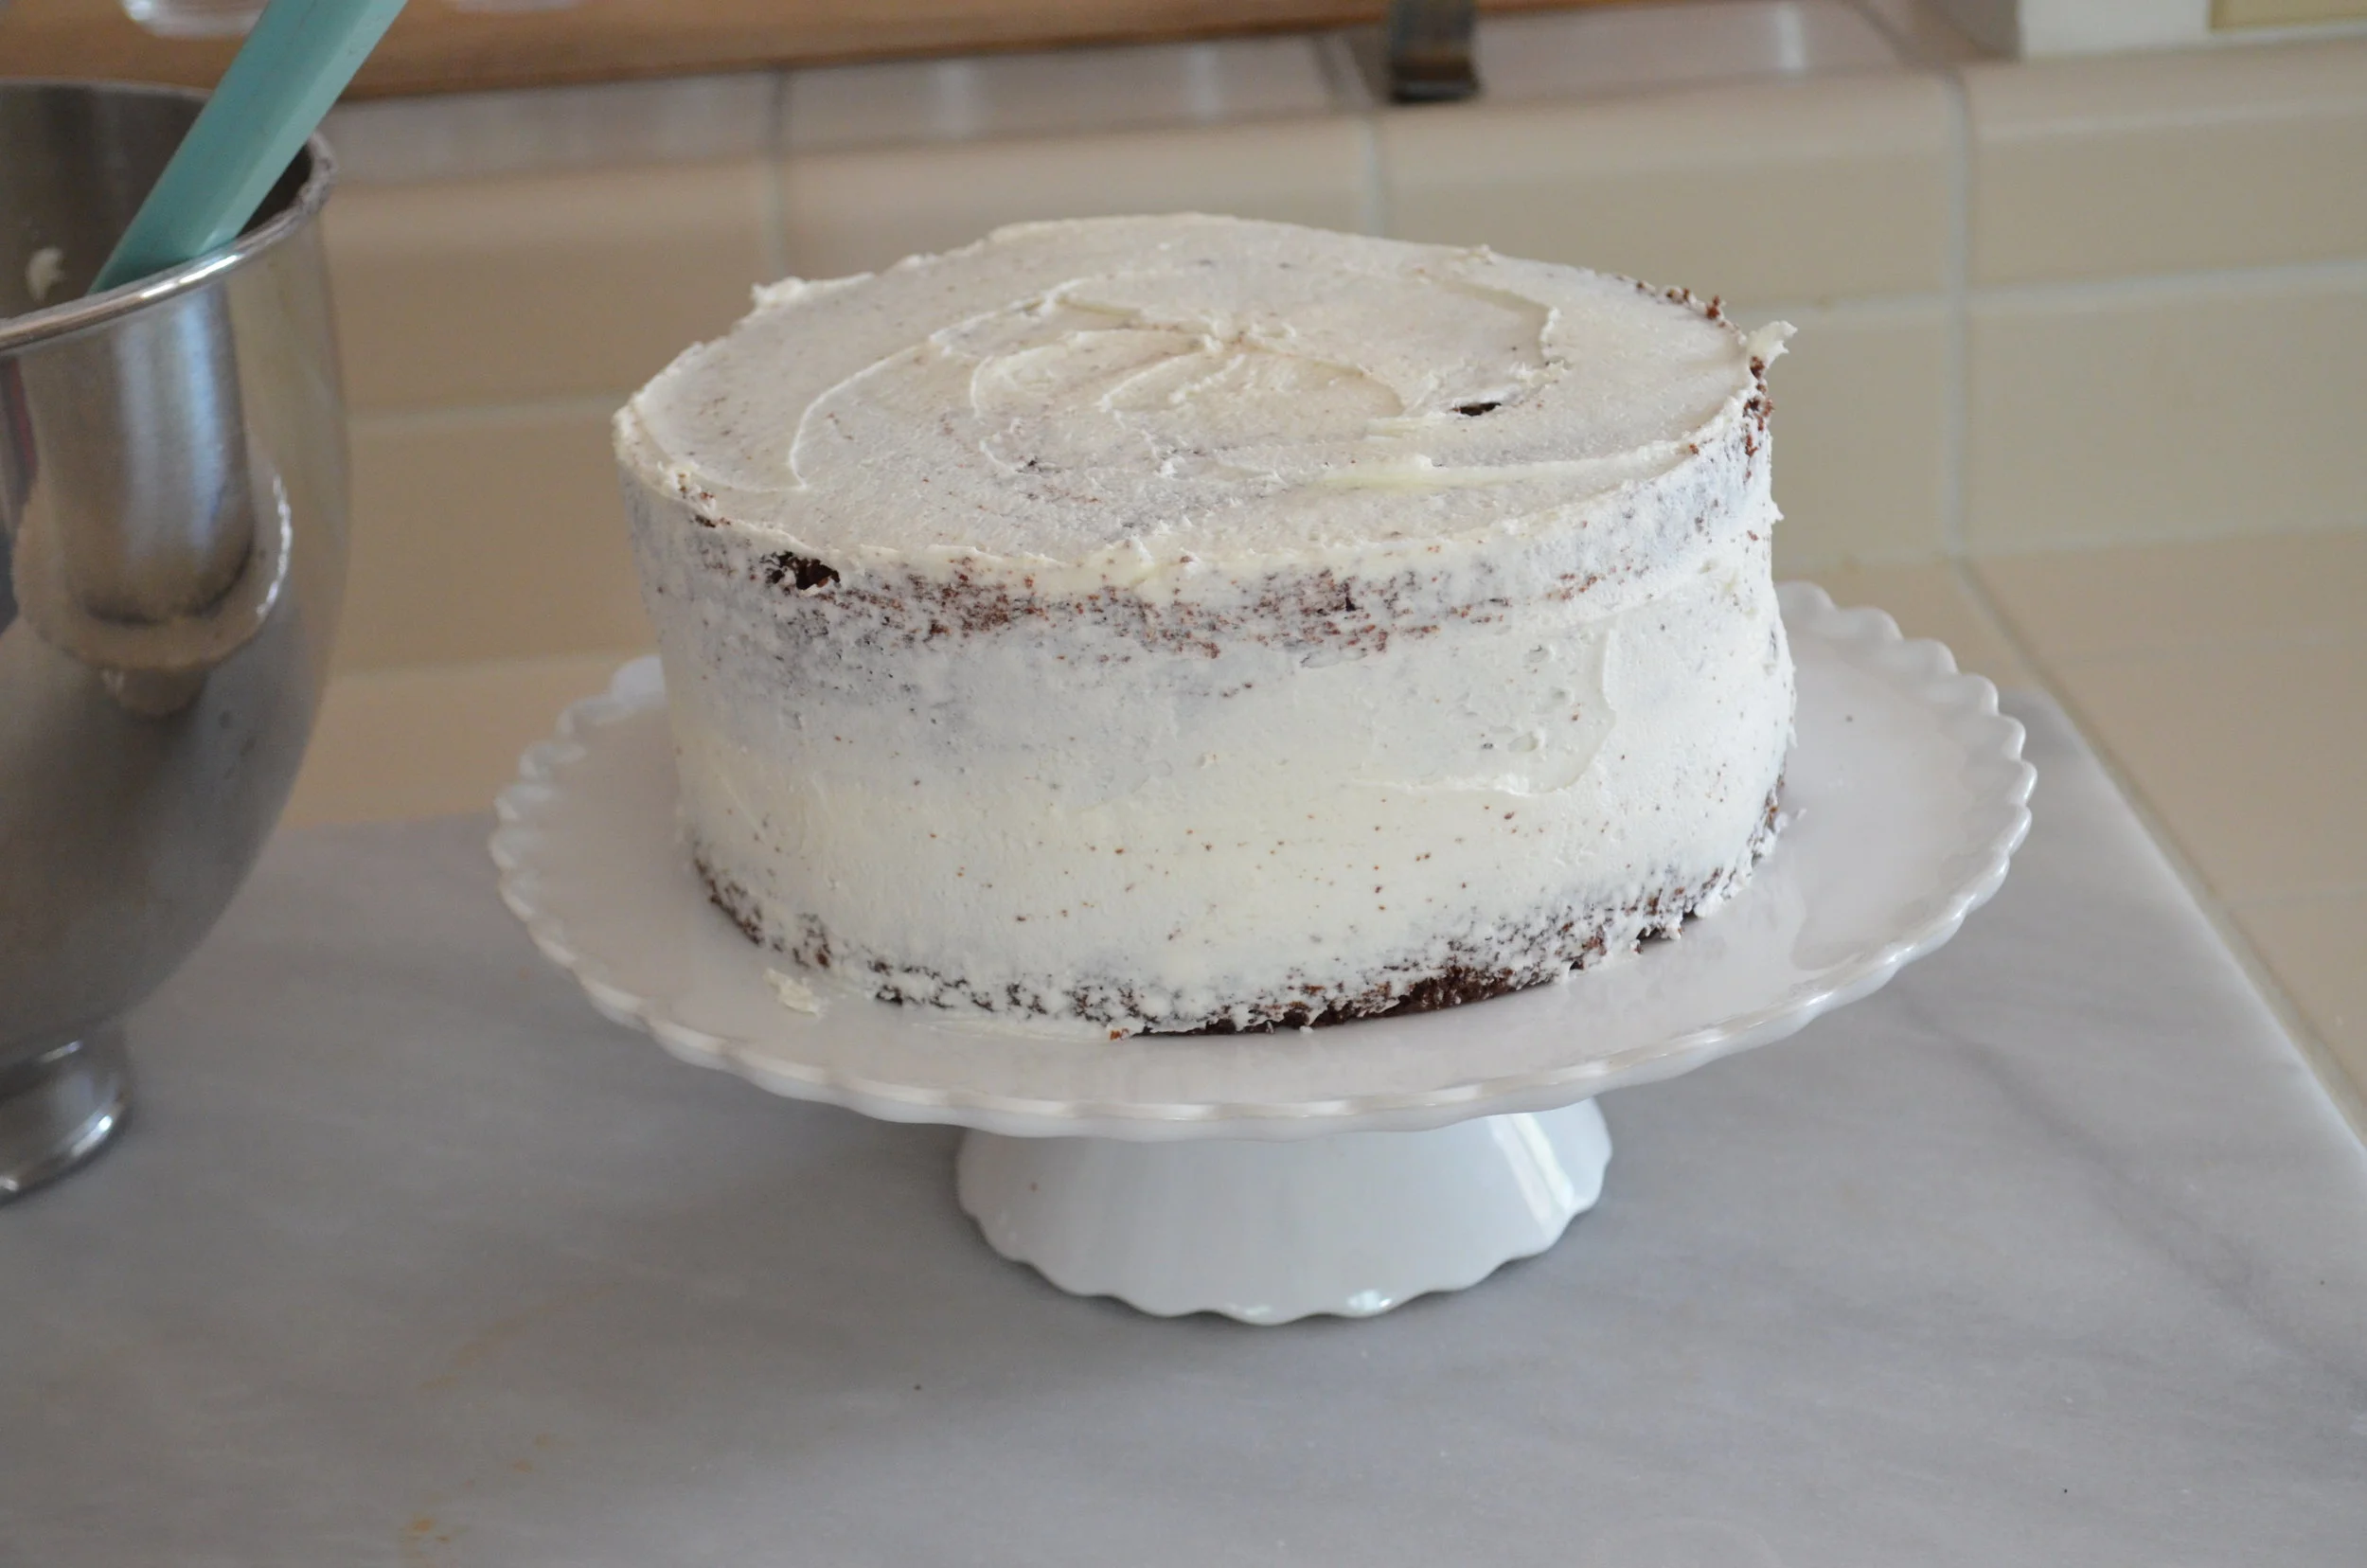
*Make sure to do a “crumb coat” first! This means that you put a thin layer of icing all over the cake to smooth out, and hold down, any crumbs. Then you place it in the fridge for about 15-30 minutes.
*When making the buttercream icing, make sure all of the ingredients are room temperature.
*Then do a clean layer of icing on top of the crumb coat right when you take it out of the fridge. This allows the icing to go on smoothly.
*Use an offset spatulato apply the frosting for best results!
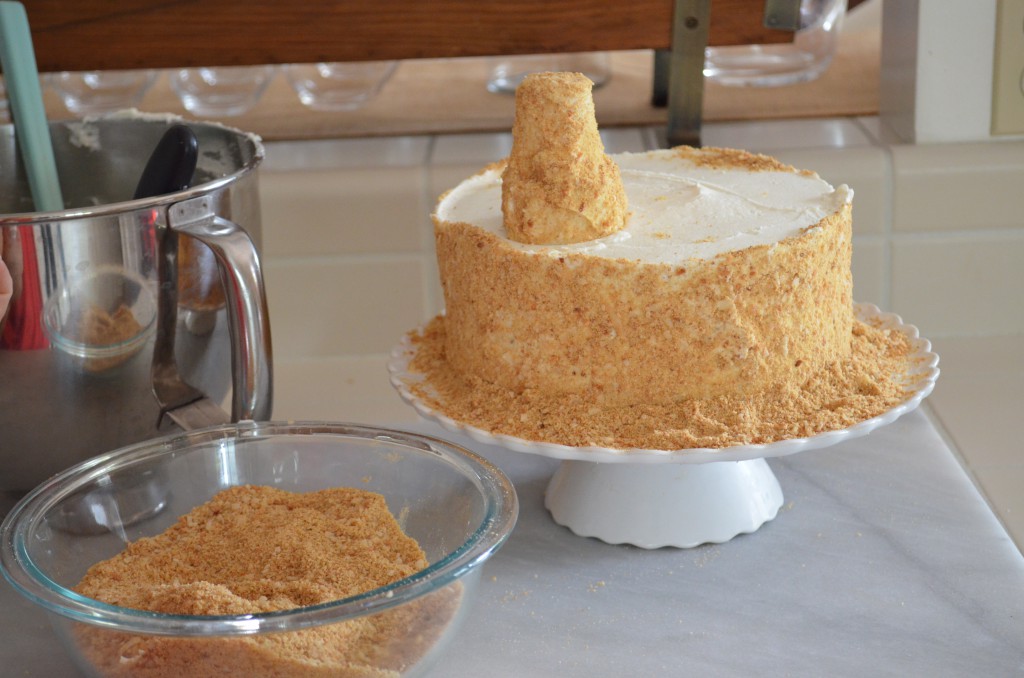
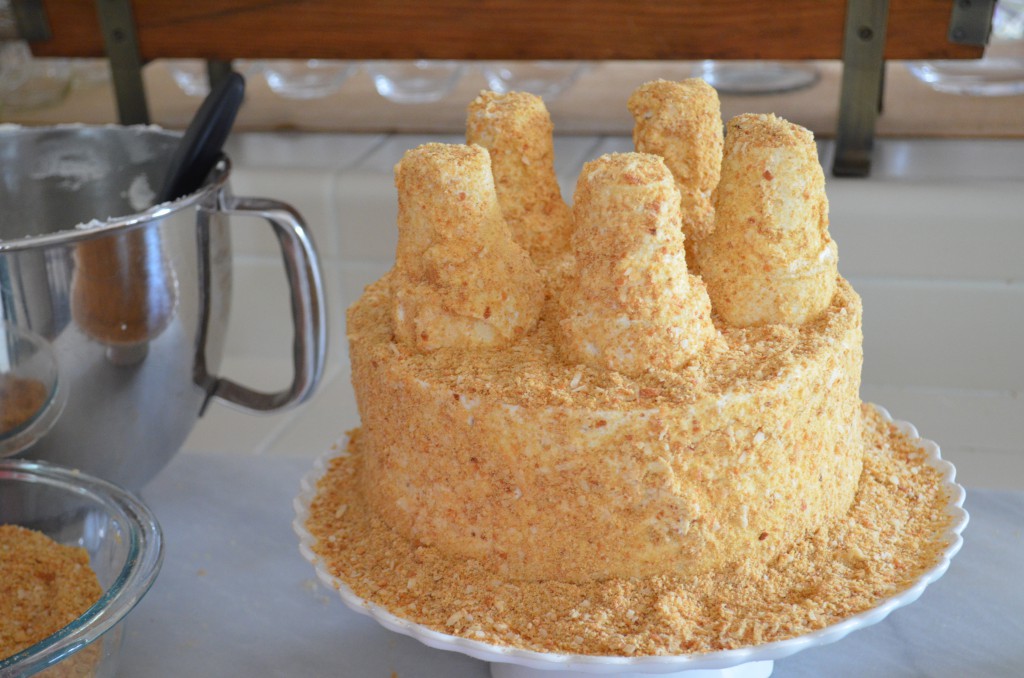
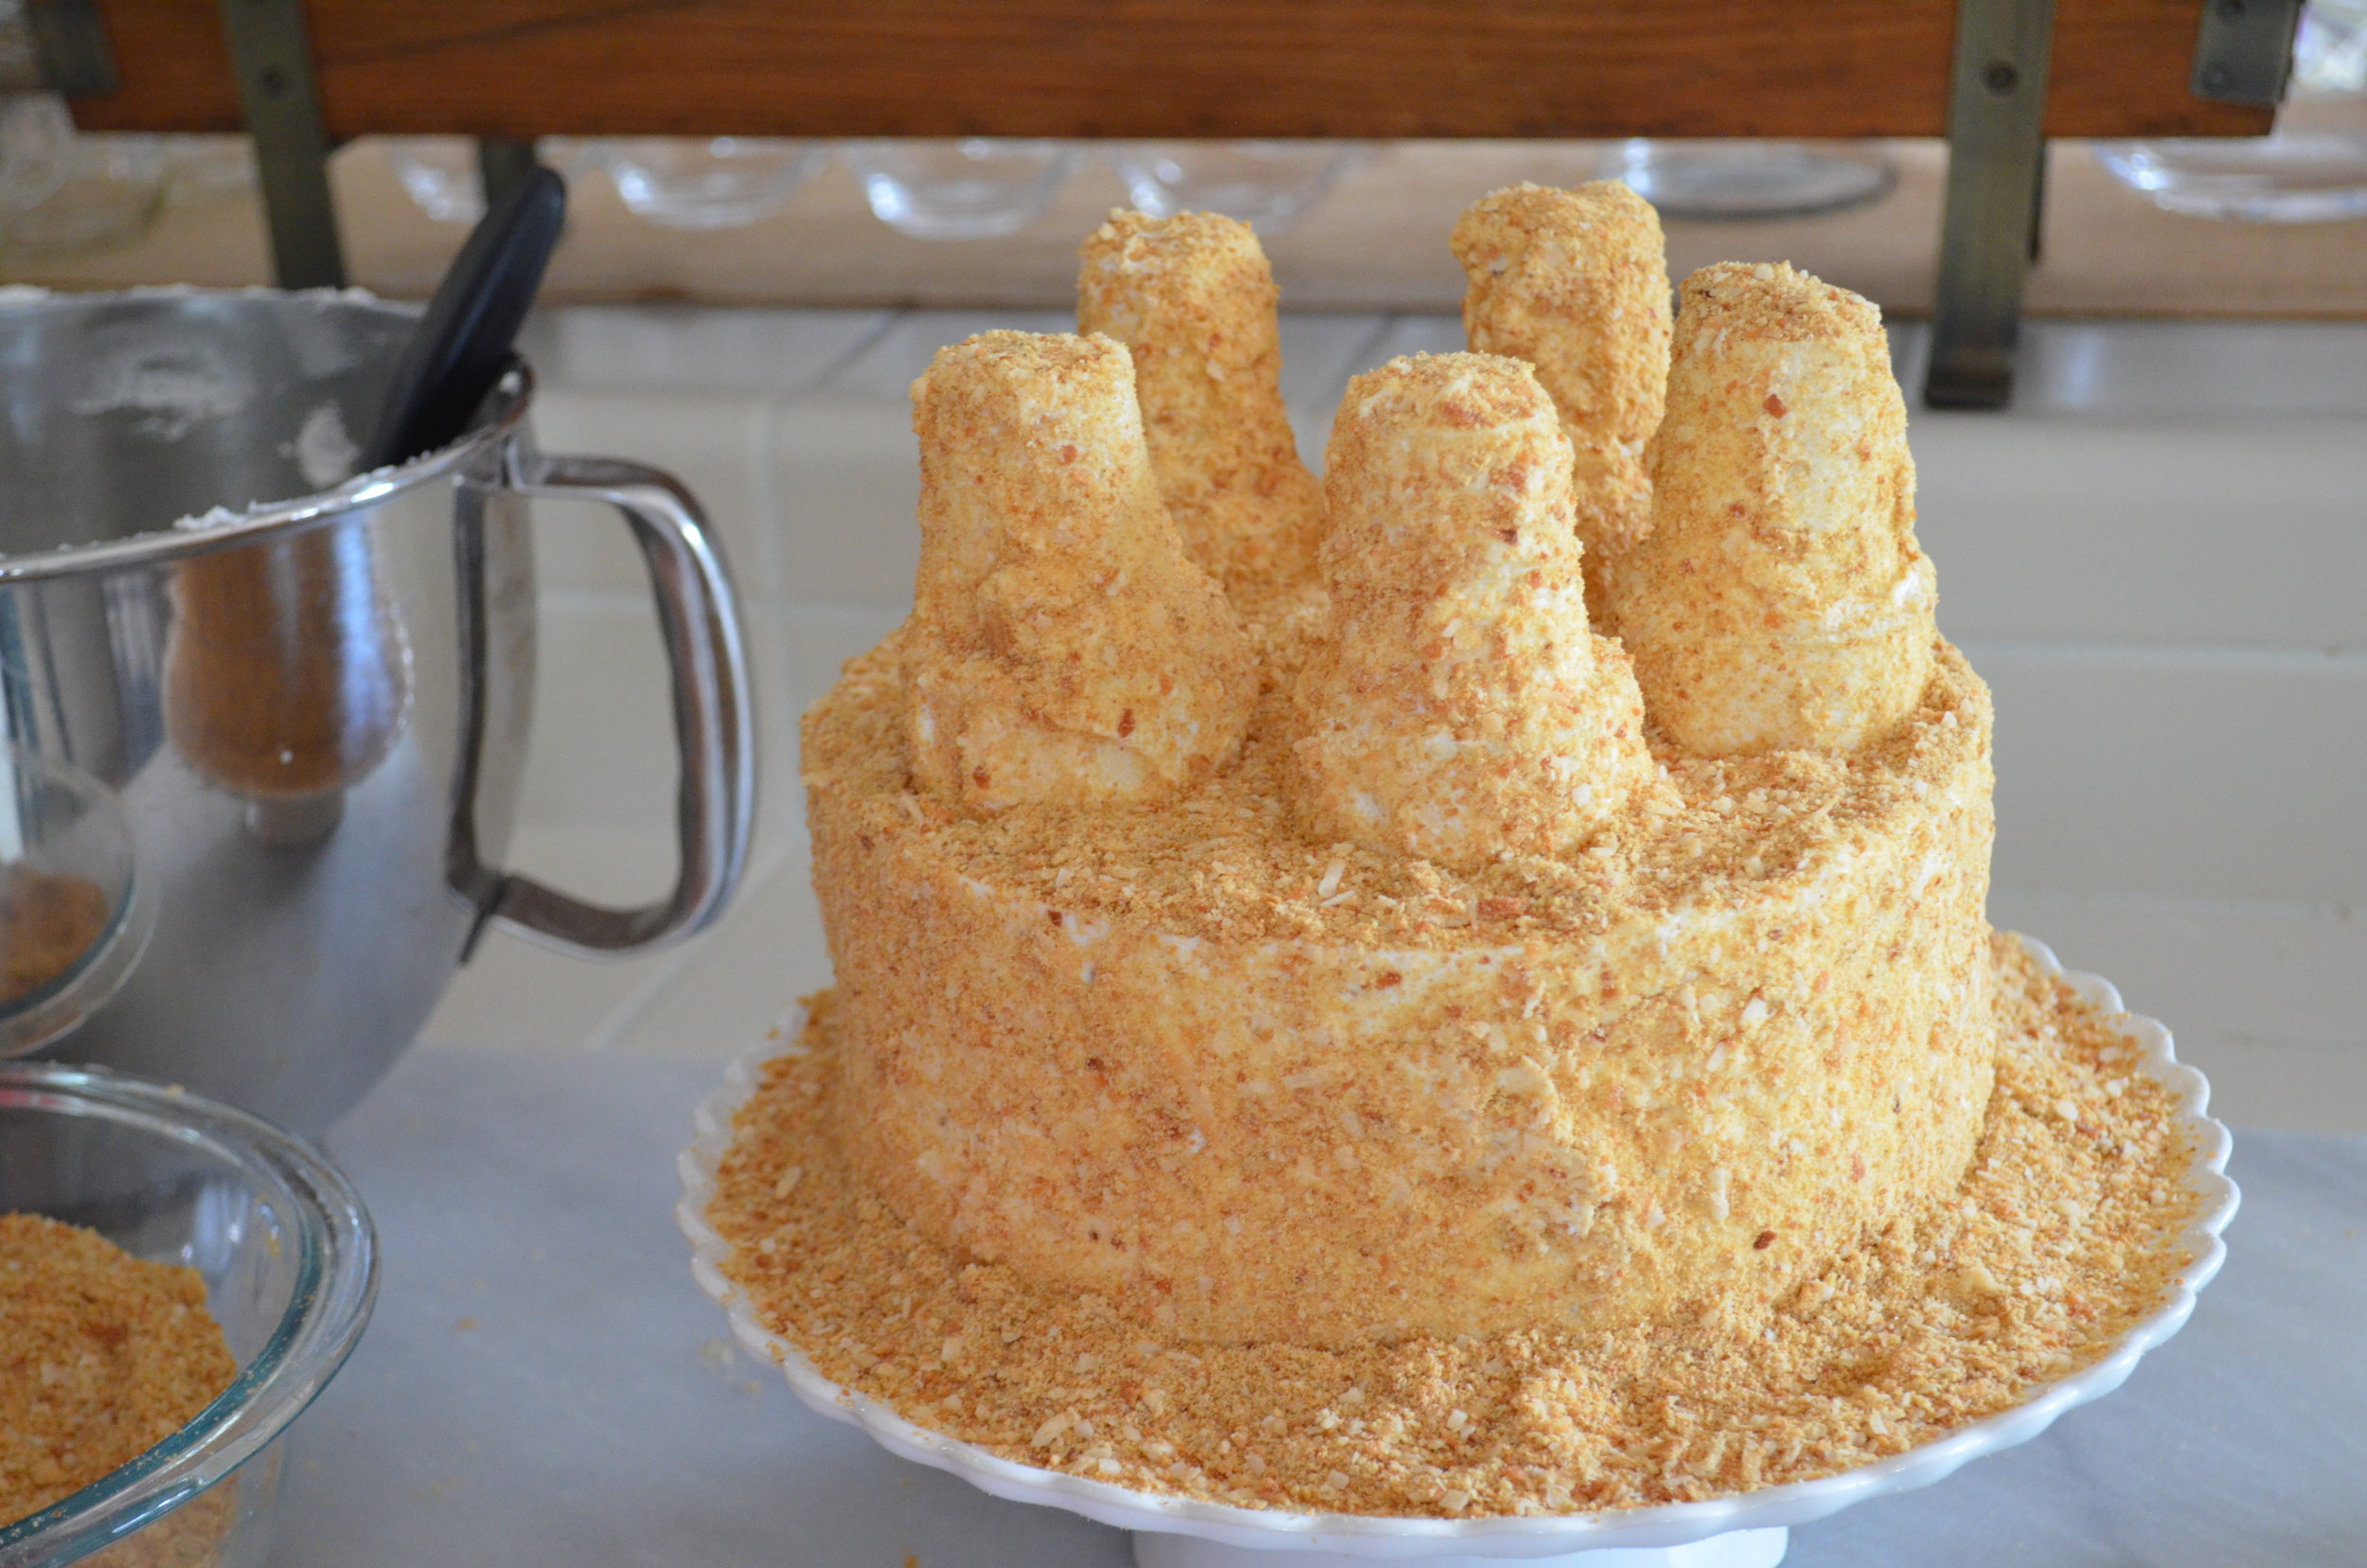
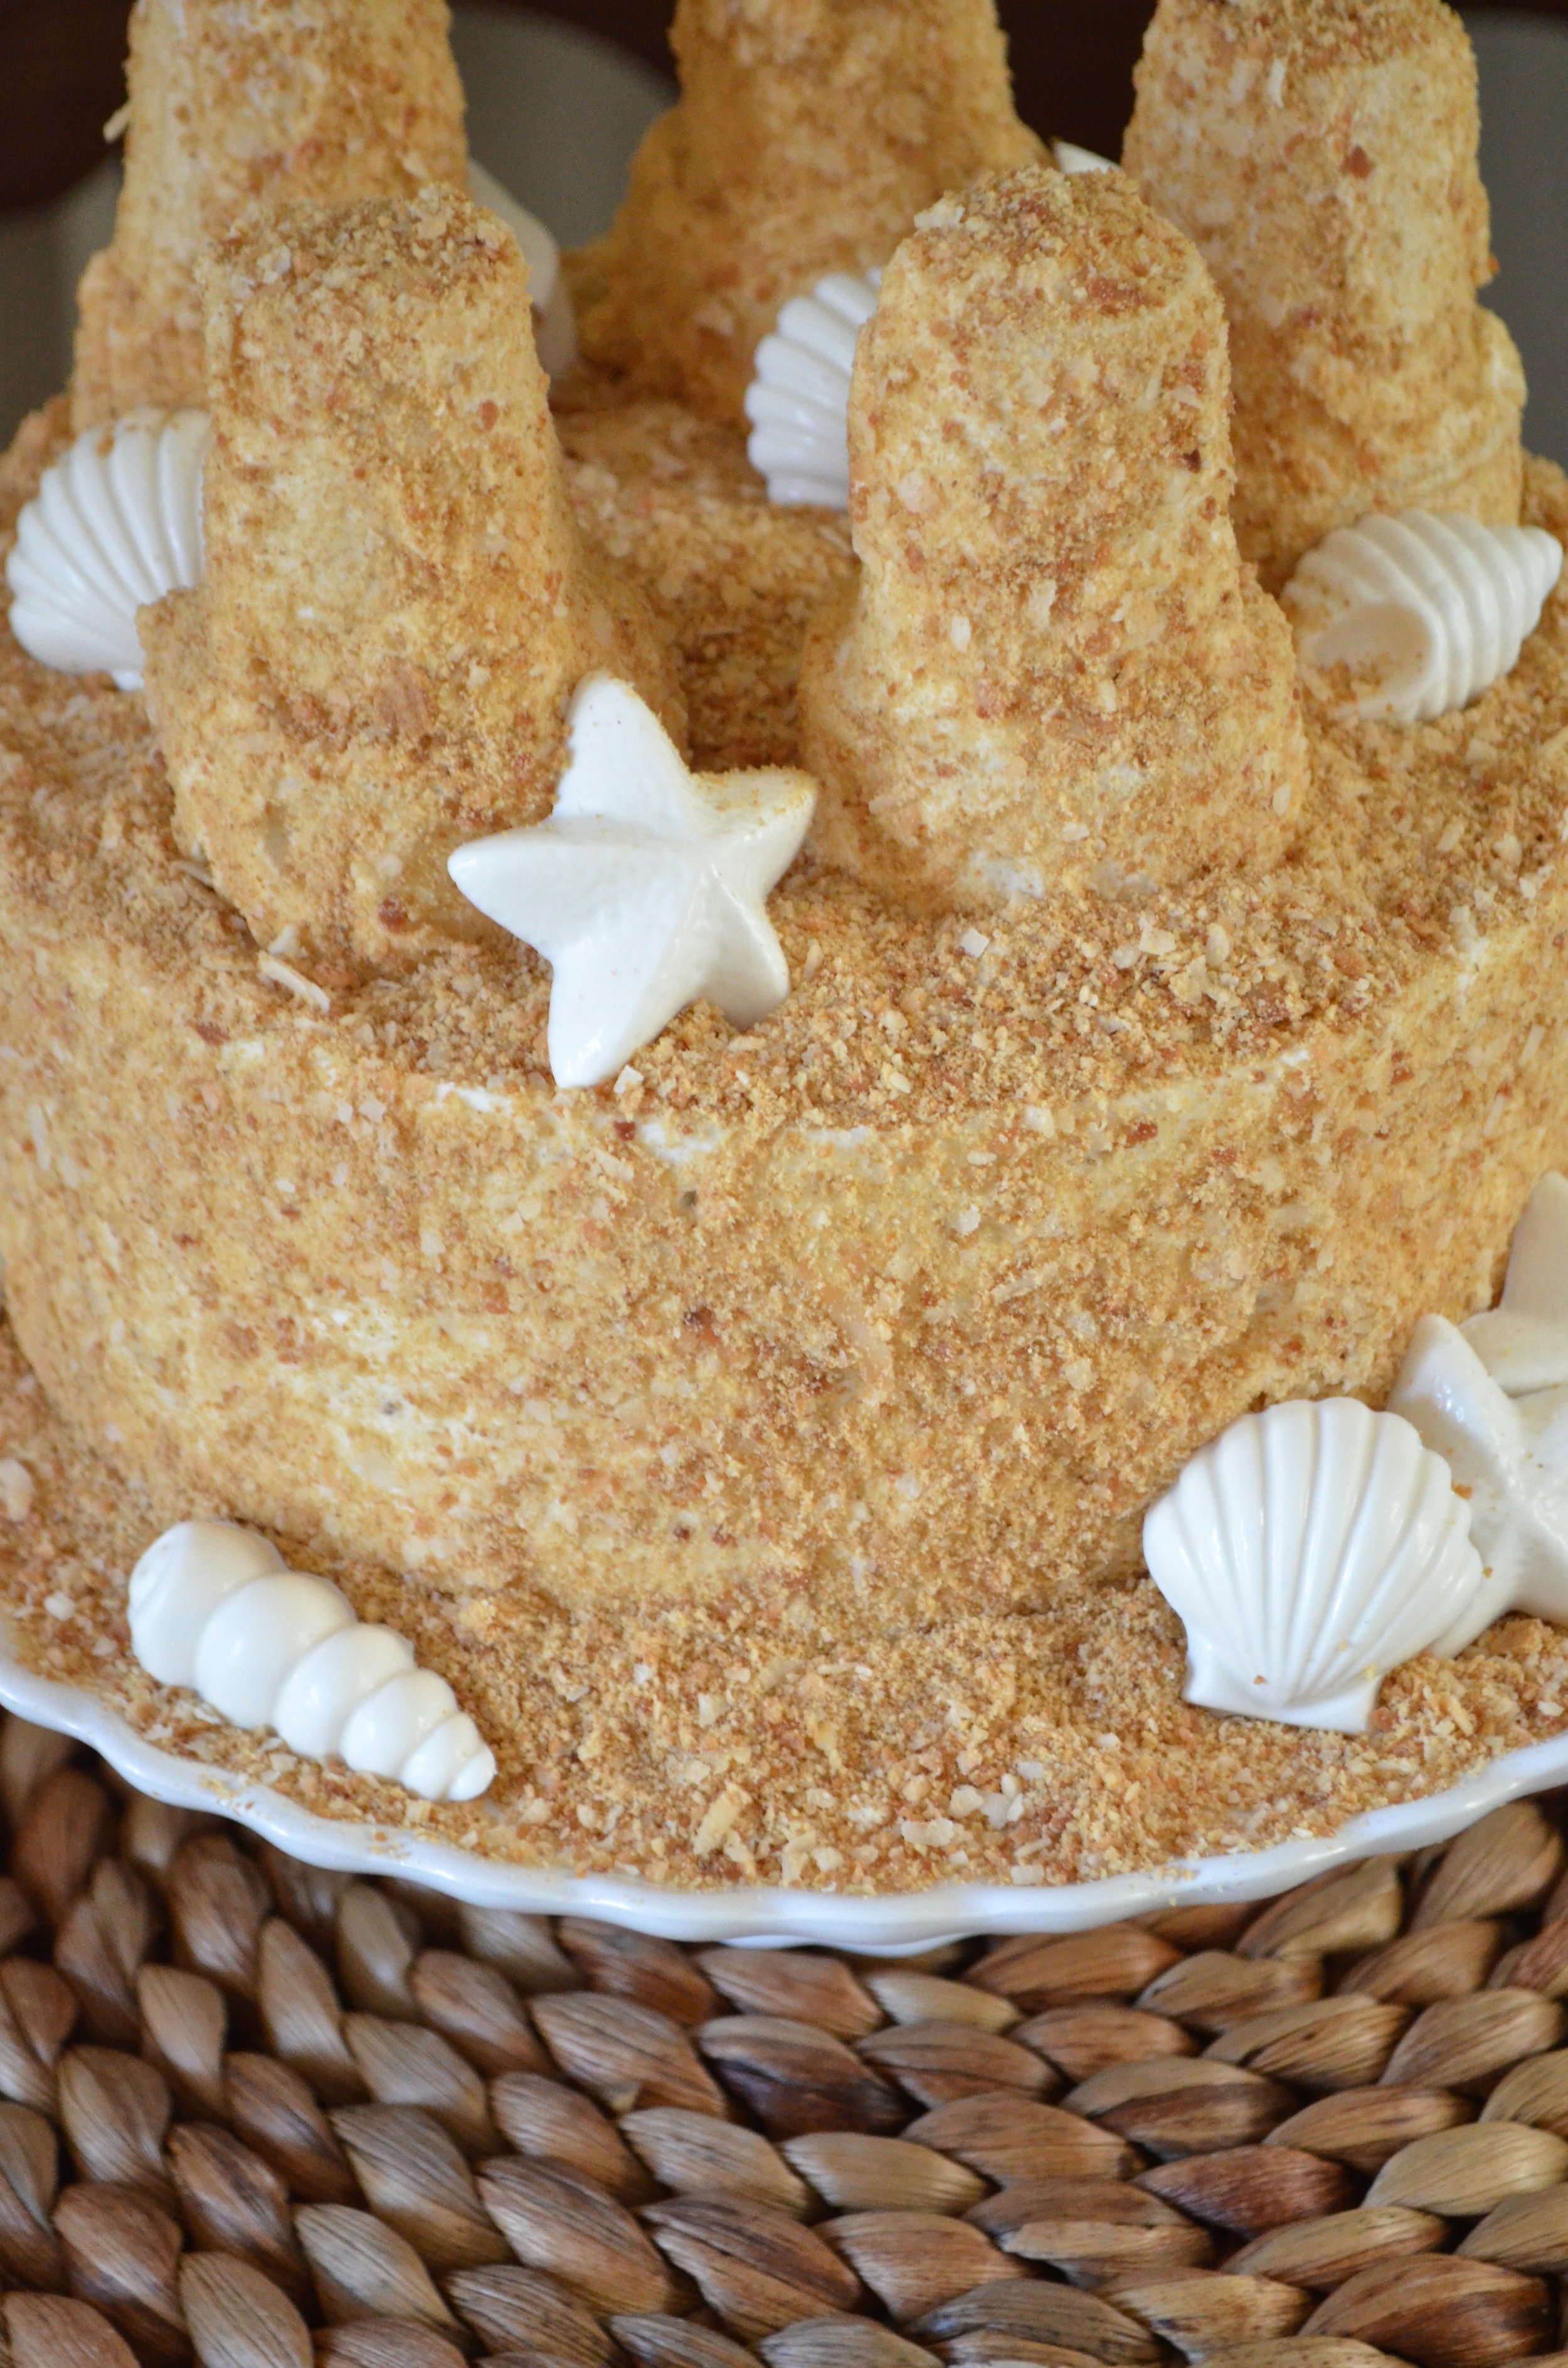
*Then you want to add the “sand” on right after you put the final layer of icing on. You don’t want it to harden, otherwise the sand won’t stick as well.
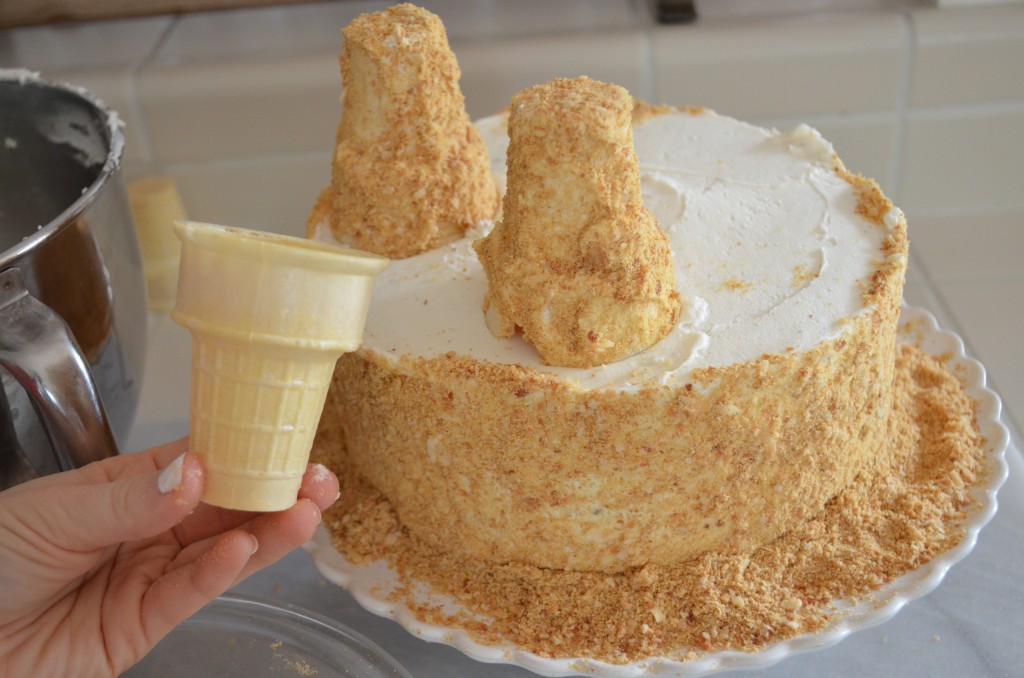
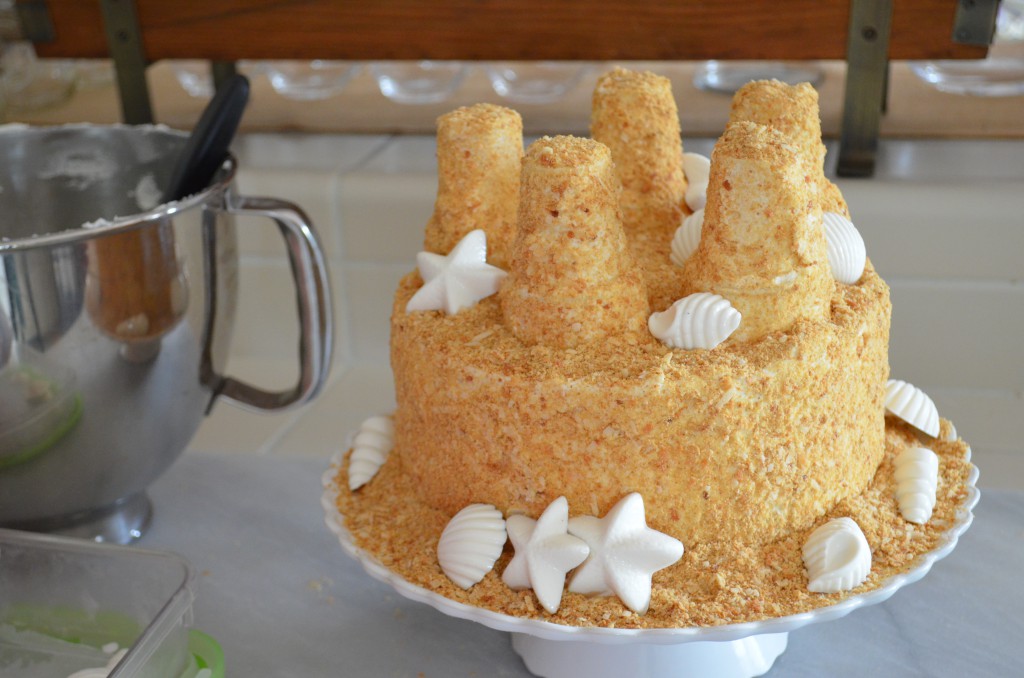
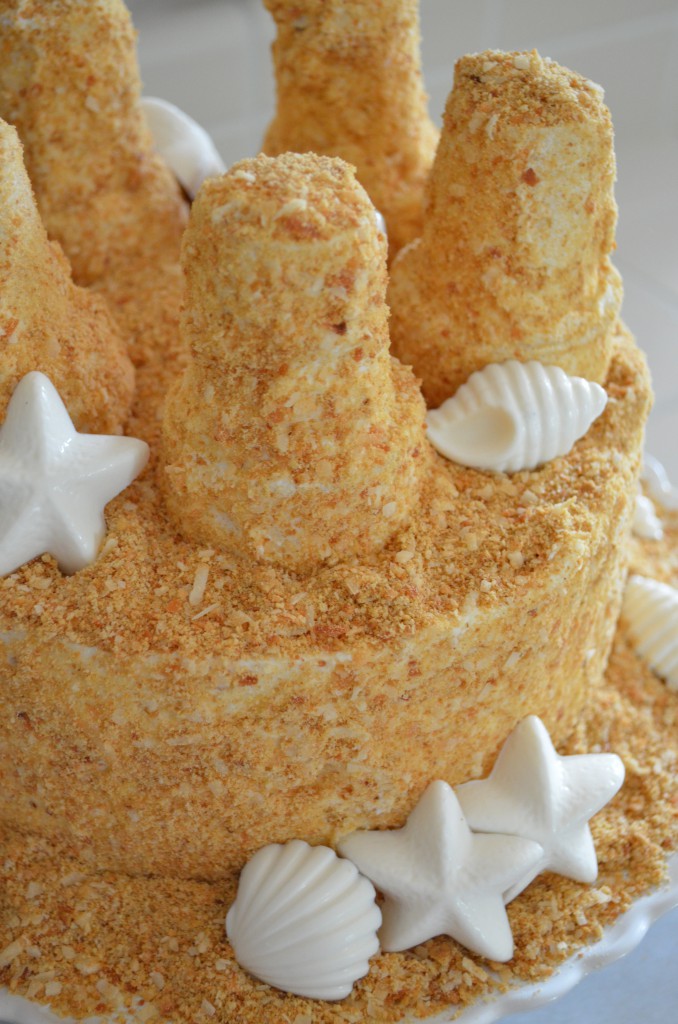
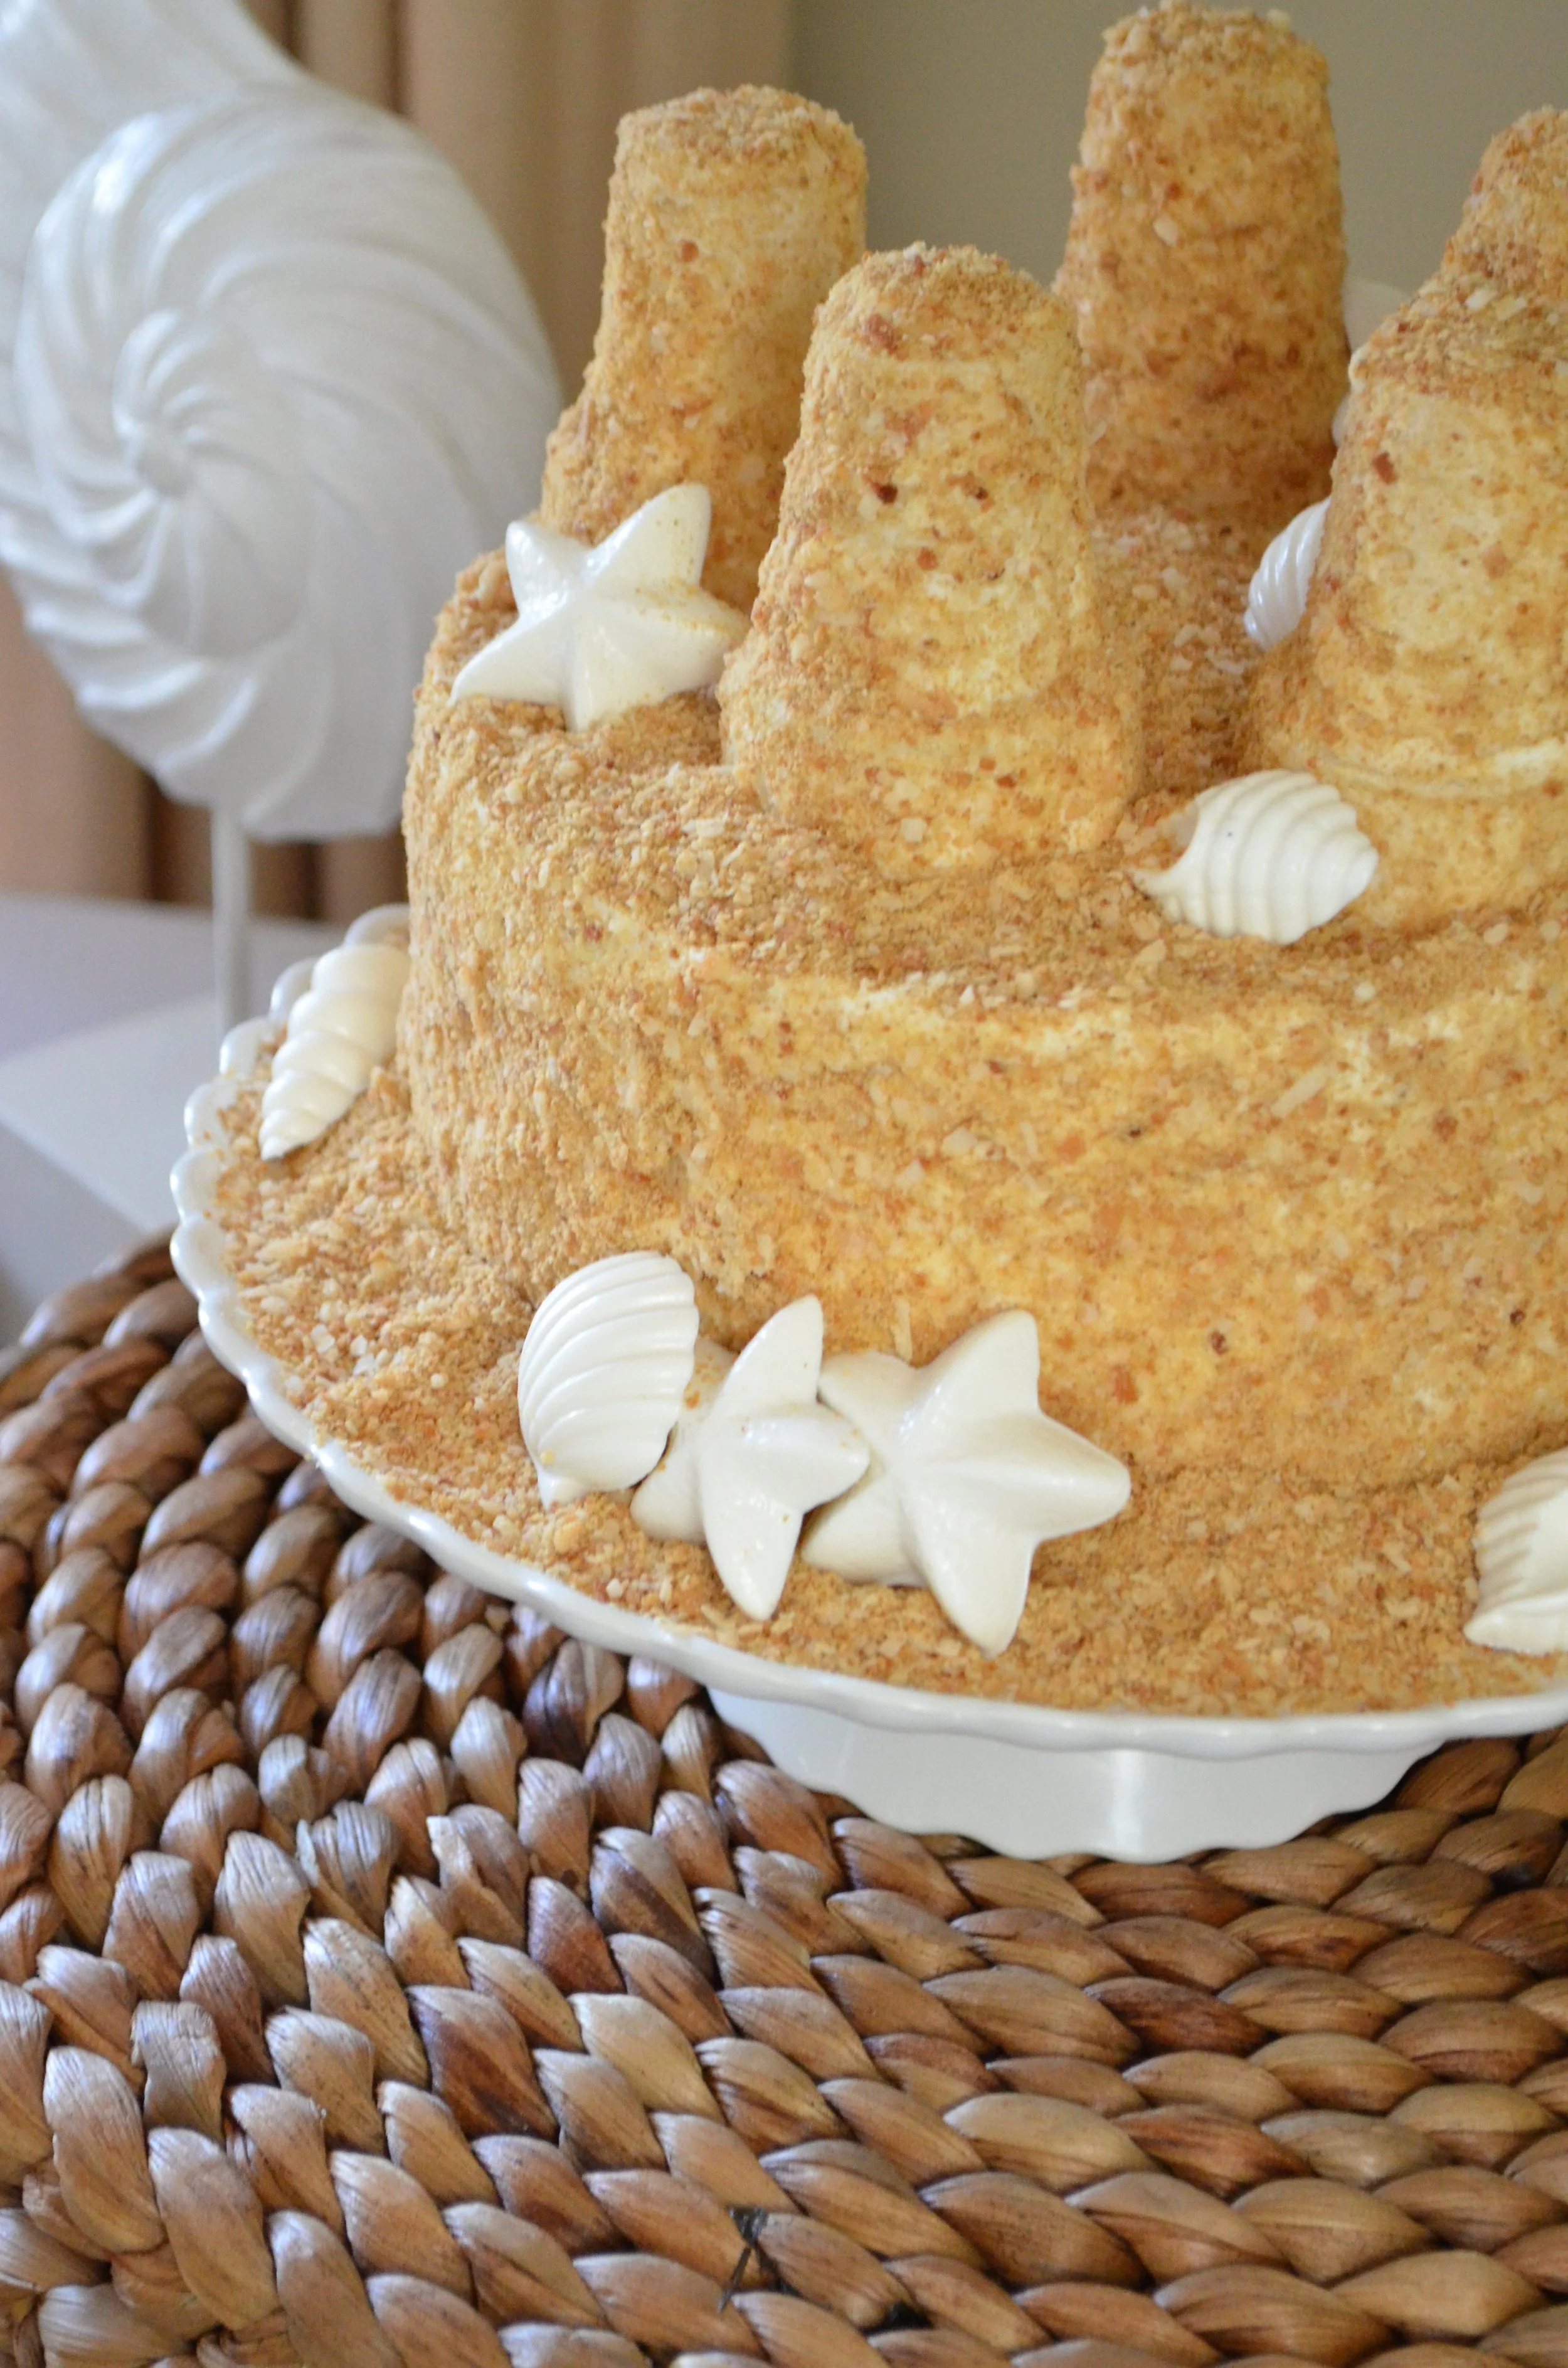
*When adding the sand, do the sides first. Leave the top uncoated until you add the ice-cream cones on.
*Cover the ice-cream cones with icing, then roll them in the sand. Place them on the top of the cake that has icing on it, but doesn’t have “sand” on it yet, because if you put the sand on before the cone, the cone may not stick on the cake as well. The icing is like the glue!
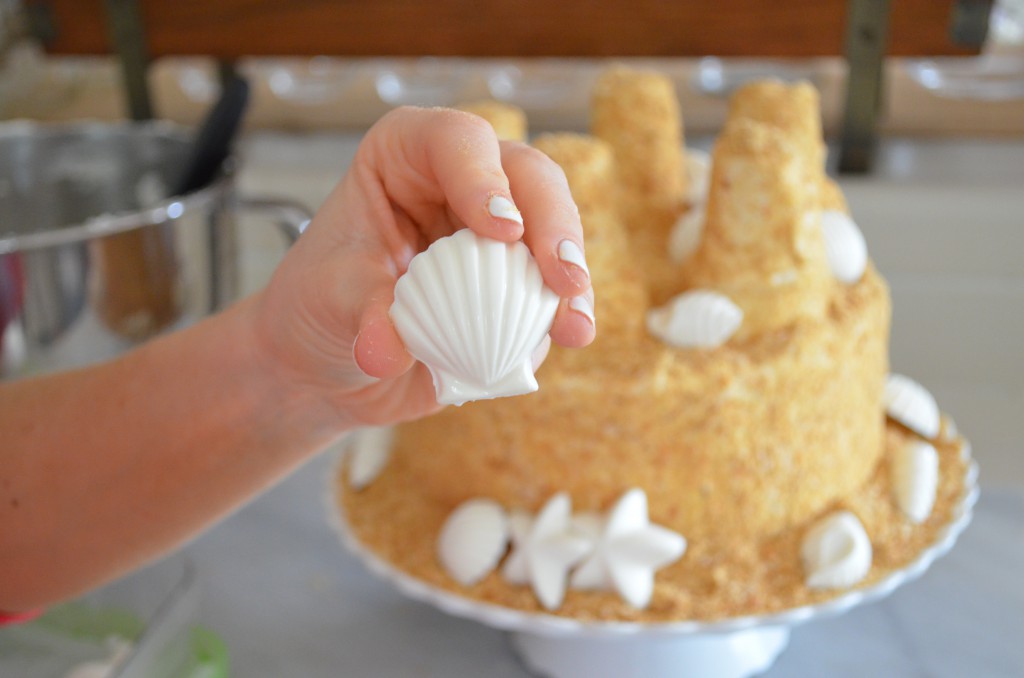
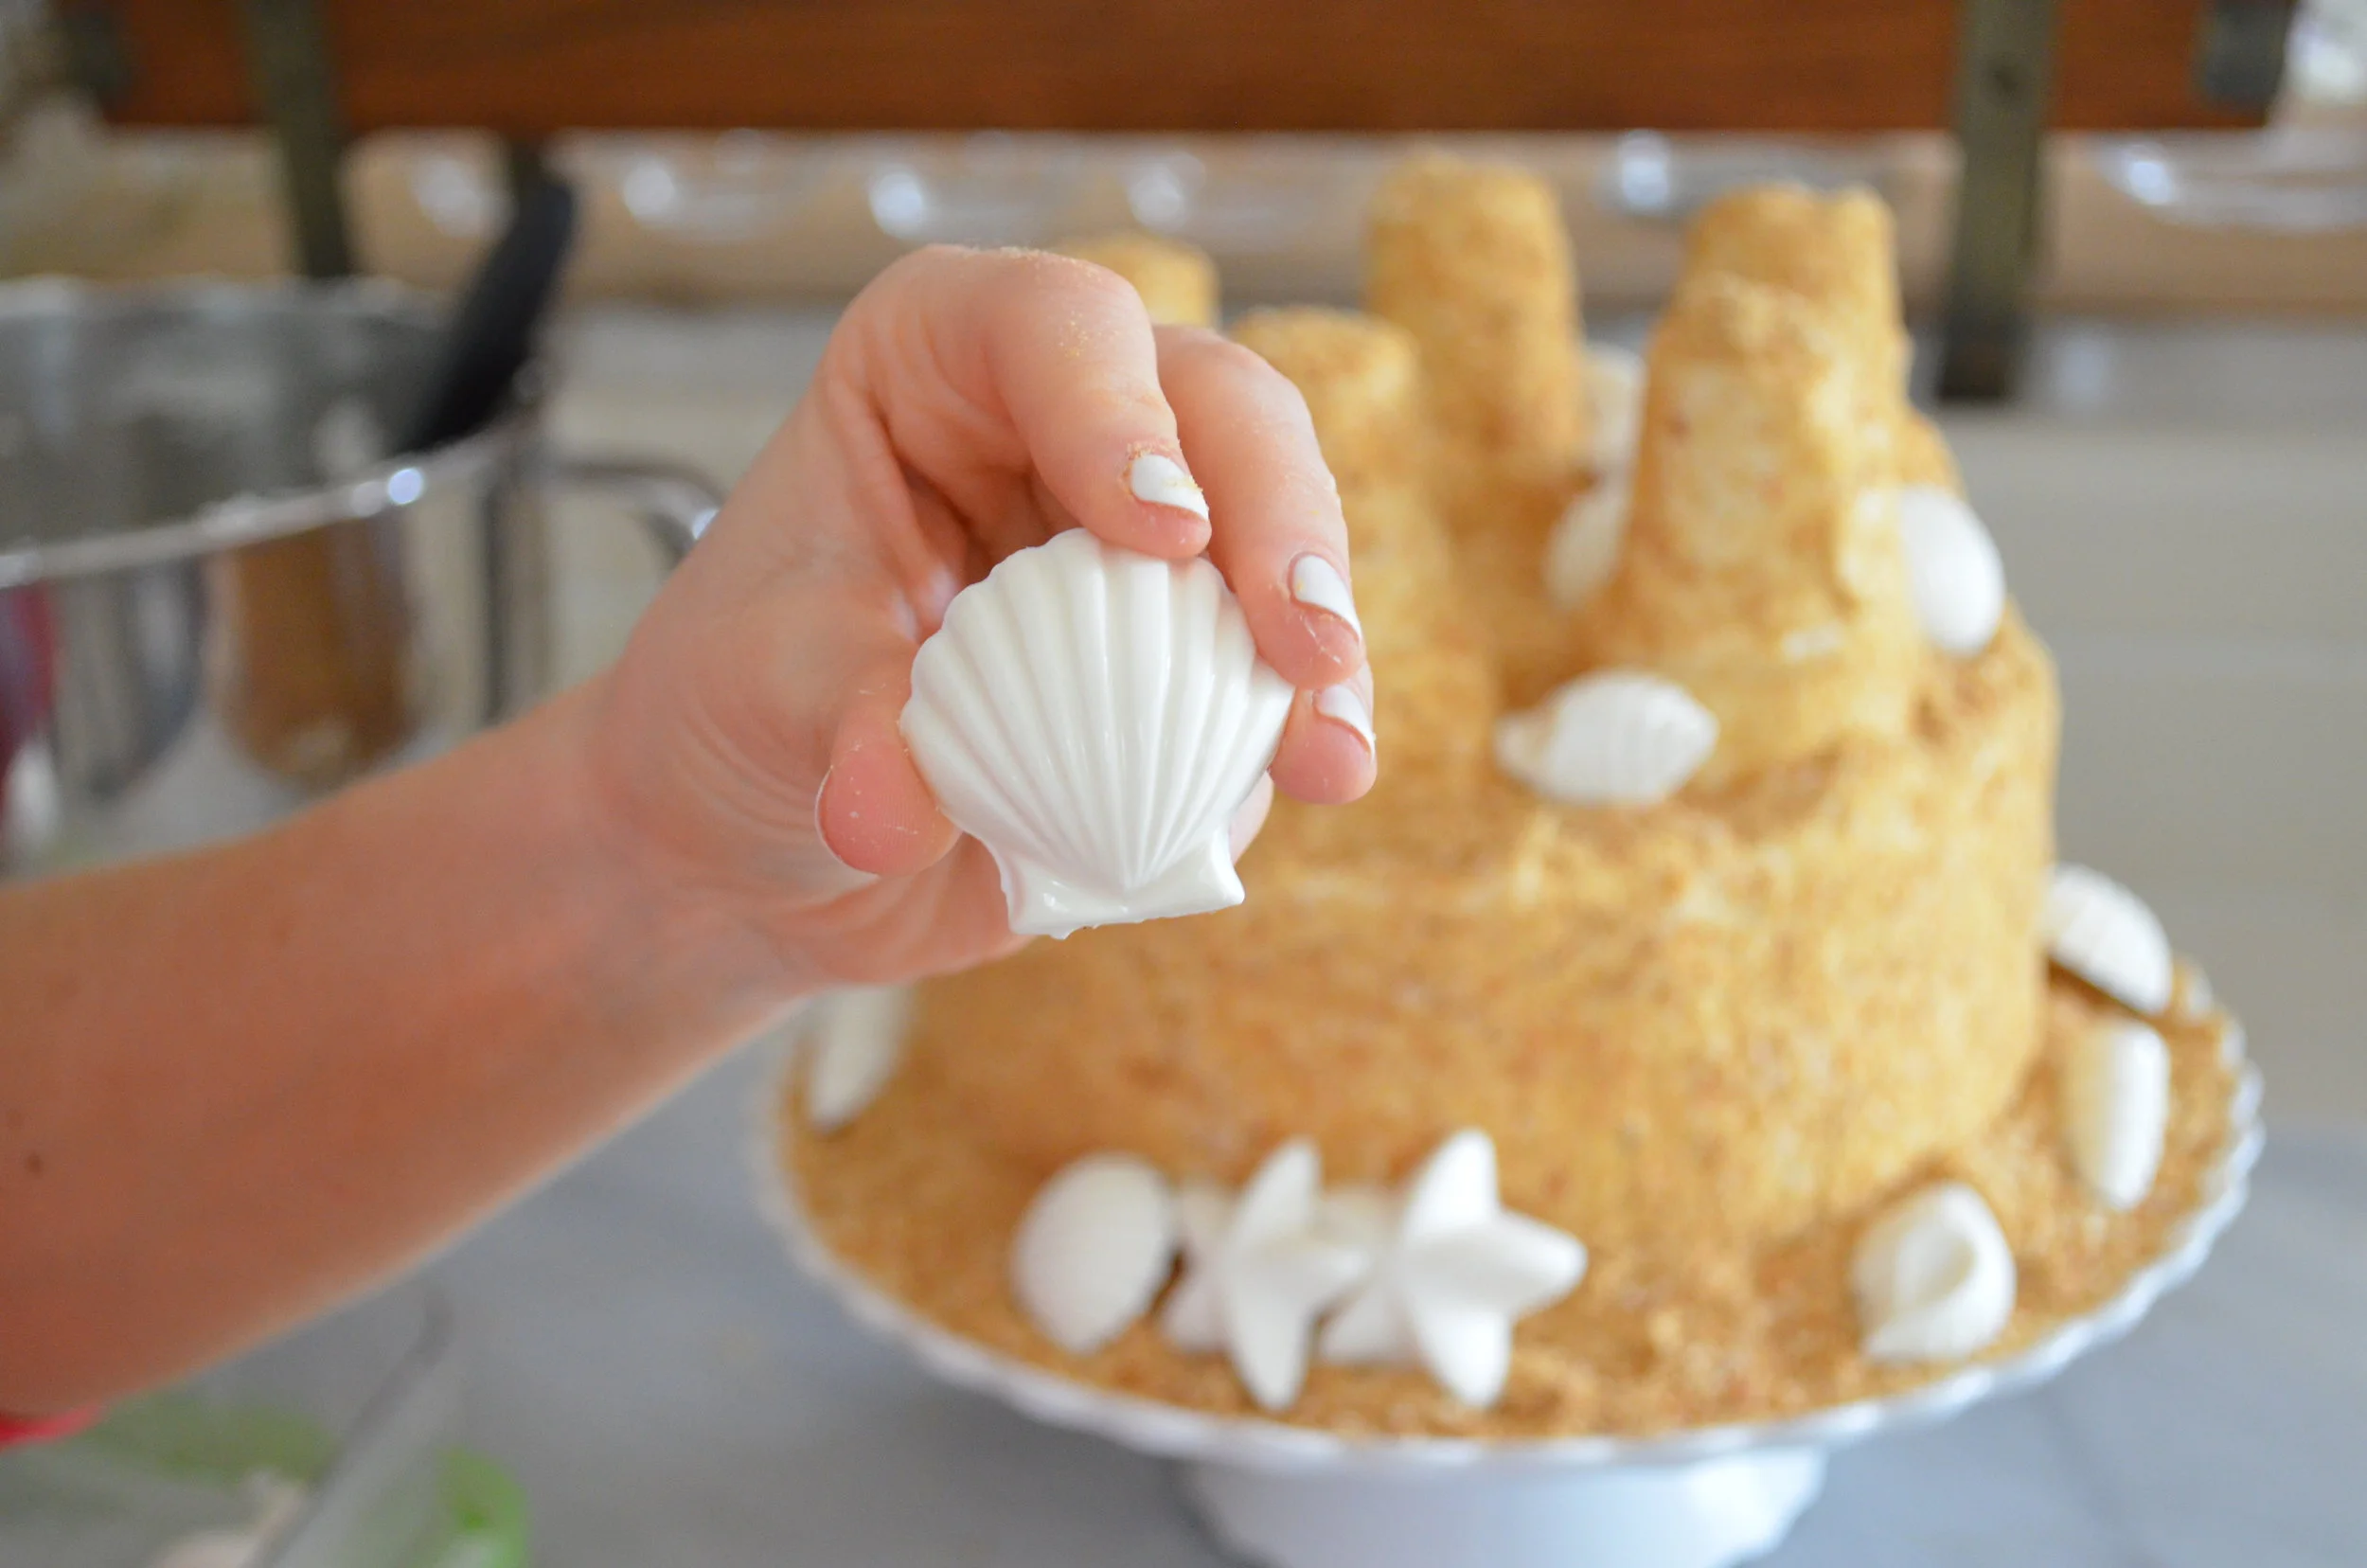
*Make your own white chocolate shells by using candy coating chocolate. You don’t want to use regular white chocolate, because it won’t hold the shape and harden up as nicely.


Sand Castle Cake
Author:
Maria Provenzano
Ingredients
-
Chocolate Cake; I used 2 8 inch rounds for this specific cake
-
5 icecream cones with flat bottoms
-
Buttercream Icing:
-
1 cup unsalted butter; room temperature
-
1 pound powdered sugar
-
2-5- tablespoons whole milk; room temperature
-
1 teaspoon vanilla extract
-
Sand
-
2 cups ground graham crackers
-
2 cups coconut, toasted and finely ground
-
White Candy Coating Chocolate
-
Candy Seashell mold
Instructions
-
Buttercream Icing:
-
Beat the butter until it becomes light
-
Add in the powdered sugar and slowly begin to mix together
-
Add in the vanilla extract
-
With the mixer running (stand mixer or hand mixer works) add in a couple tablespoons of room temperature milk; add more if the frosting is too thick; you are looking for it to be spreadable and smooth
-
For the “sand”
-
Preheat oven to 350 degree
-
Place the coconut onto a baking sheet lined with parchment paper and spread it out so it is in an even layer
-
Place in the oven for 5-10 minutes or until lightly toasted, and the color of sand you are looking for
-
Allow to cool
-
Place the graham crackers and the cooled toasted coconut into a food processor and process until it looks like sand!
-
White Chocolate Seashells:
-
Place the white candy coating chocolate in a bowl over a pot with simmering water, being sure the water isn’t touching the bowl
-
Stir frequently until the chocolate has melted
-
Pour the chocolate into the clean candy molds
-
Tap on the counter to help the chocolate spread throughout the mold
-
Place in the fridge to harden
-
Once hardened, the chocolate can be removed from the mold
-
For the Cake
-
Place the cake on a cake stand
-
Apply the “crumb coat” which is a single layer of icing to hold down any crumbs
-
Place in the fridge for 15-30 minutes
-
Take the cake out, and immediately apply another clean layer of icing, smoothing it out with an off-set spatula to make it look clean
-
Use your hands to apply the “sand” around the sides of the cake
-
Cover the ice-cream cones with frosting, and coat them with sand
-
Place the ice-cream cones around the top of the cake
-
Cover the top of the cake that is still showing frosting with the “sand”
-
Place the white chocolate seashells around the cake as desired
Wow! I love it :)I have a question if I made the crumb mix up do you think it will store for a couple of days before I can make the cake?
x
Yay! You shouldn’t have a problem storing it for a couple days as long as it is in a sealed container or sealed plastic bag! Would love to see the results! xo
Wow! I love it :)I have a question if I made the crumb mix up do you think it will store for a couple of days before I can make the cake?
x
Yay! You shouldn’t have a problem storing it for a couple days as long as it is in a sealed container or sealed plastic bag! Would love to see the results! xo
Our Grandkids will love this castle cake. I am going to have fun making this for them!! I like that it is onthe easy side of making and yet it will look like it took forever to create.
Yay!!! Let me know how it goes 🙂
Our Grandkids will love this castle cake. I am going to have fun making this for them!! I like that it is onthe easy side of making and yet it will look like it took forever to create.
Yay!!! Let me know how it goes 🙂
Can you make the cakes ahead of time a put them in the freezer, because I will have my grandkids for sleepover the night before the party and won’t have time to do the cake
Hi! Yes, you can make the cake ahead of time and freeze them by wrapping them tightly and then storing them in a freezer-safe container or bag. Then, I would assemble it either the day before or the day that you would like to eat it. I think the “sand” tastes best freshly made. I hope this helps! Let me know how it turns out 🙂
Looks so very fun and cute !!
Looks so very fun and cute !!