Christmas in July Santa Cookie Trays with Waterslide Decal Paper
Christmas in July Santa Cookie Trays with Waterslide Decal Paper
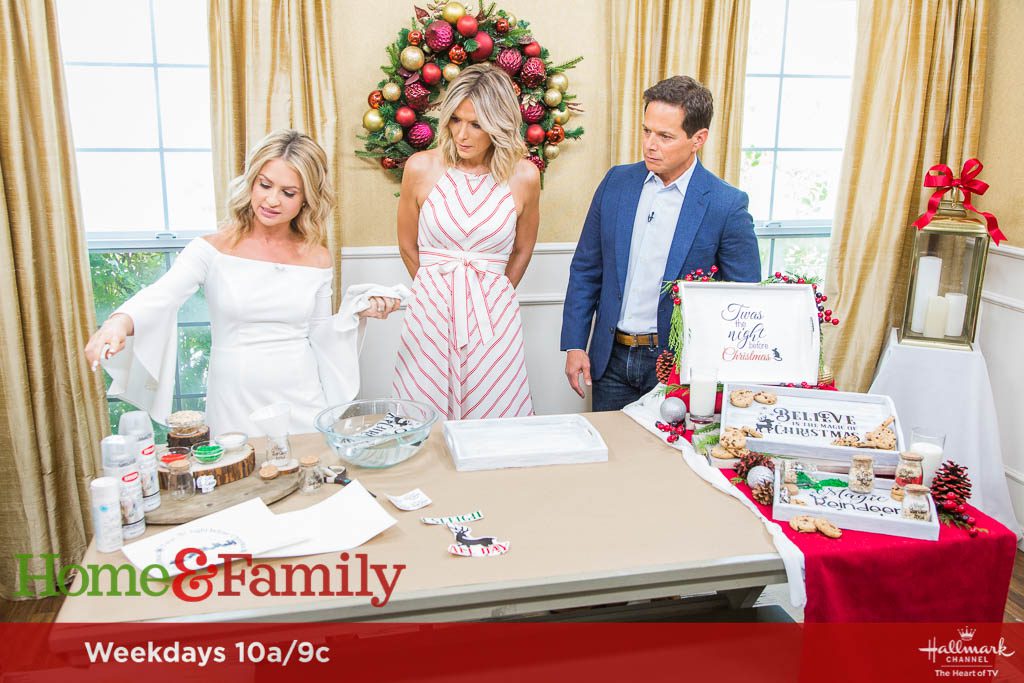
It is Christmas in July on Hallmark Channel and we are kicking it off in a big way on Home and Family.
These trays are beyond cute, and they turned out to be so much easier than I expected them to be. I wanted to create a ’twas the night before Christmas theme for Scott Wolf, since his family loves that book during the holidays. I came across this waterslide decal paper, and it is everything i need in life. If you have a cricut, then you may not need to use this paper, but for those who do not own a cricut, then this is the way to go.
The waterslide decal paper is super easy to work with as long as you follow directions!! If you miss a step, it will not work properly.
Links coming soon for exact products as well at the video tutorial, but in the meantime, you can find the step out below!

Christmas in July Santa Cookie Trays with Waterslide Decal Paper
Christmas in July Santa Cookie Trays with Waterslide Decal Paper
Christmas in July Santa Cookie Trays with Waterslide Decal Paper
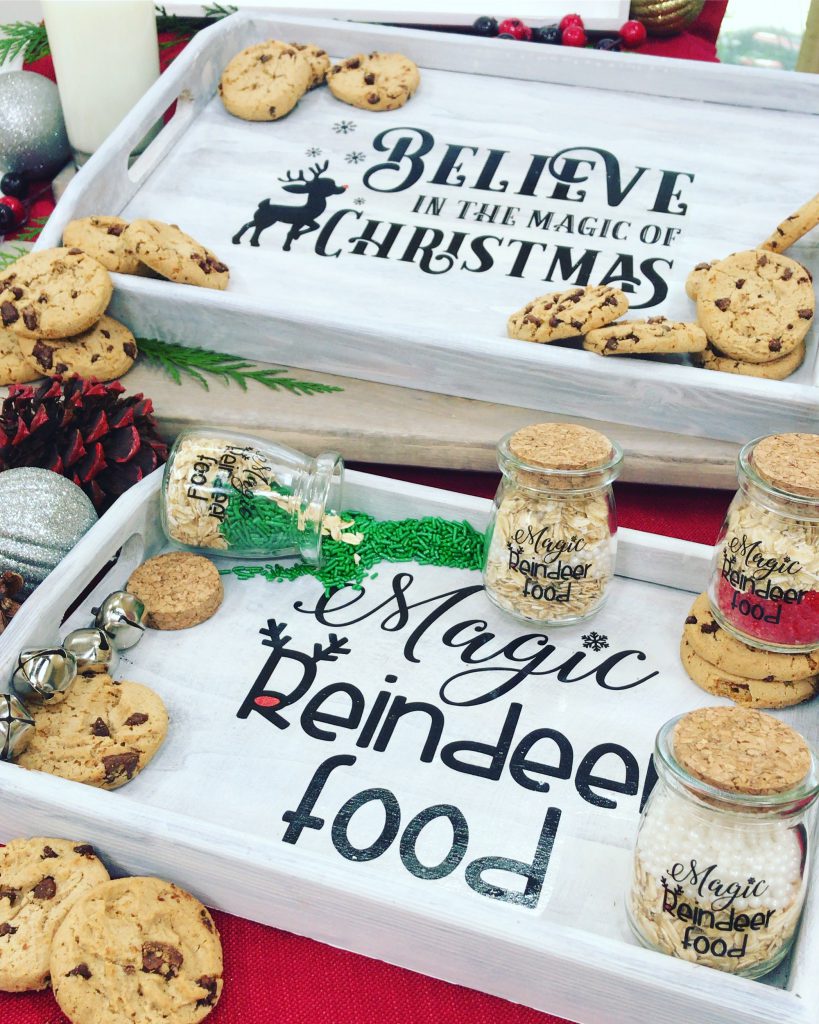
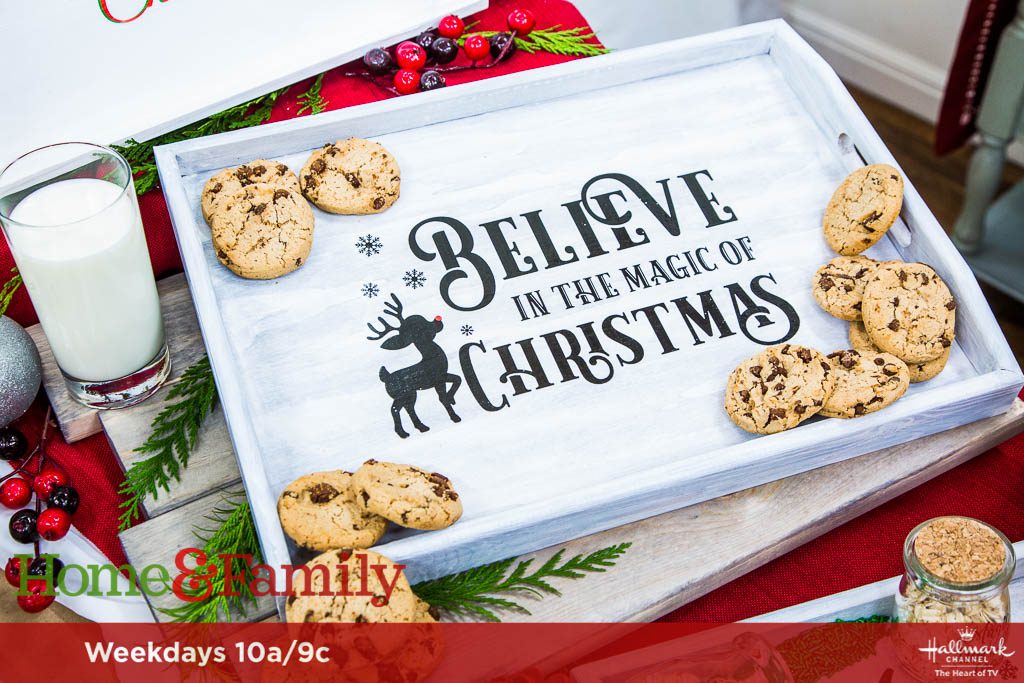
Materials for Tray
-
1 16×12 wood tray
-
White paint and paint brush
-
Clear acrylic spray
-
Holiday images
-
Laser printer
-
Waterslide paper
-
Bowl of water
Ingredients for Reindeer Food
-
Jars
-
Oats
-
Sprinkles
-
Edible glitter (optional)
Directions
1. Paint wood tray white, let dry completely (suggested 3 hours). 2. Print your design on the Laser waterslide decal paper, with your Laser printer. 3. Cut the images as close to the borders/writing as you can. Cut the decal paper into several smaller pieces so it is easier to apply them. 4. Apply three coats of the clear acrylic sealer onto the design, letting it dry completely after each coat. 5. Put the first decal paper into the water and wait for a few seconds. 6. Once dry, place the design into a bowl of water for about 30-60 seconds, or until the decal starts to peel away from the backing. 7. Remove from water and carefully place the design onto the tray; once it is placed, it cannot be removed. 8. Use a soft cloth to remove any excess water and remove air bubbles to make it smooth Allow to dry for a few hours to make sure it completely sets. 9. Repeat the process by labeling the jars for the reindeer food if desired; you could also make a gift tag if you like instead. 10. Make a funnel with a piece of paper, and add the “reindeer food,” aka oats and sprinkles, into the jars 11. Once everything is dry and set, you can place your plate of cookies and glass of milk for Santa on the tray, along with the reindeer food.
**Images available for purchase at silhouettedesignstore.com, getdrawings.com
This is soooo cute!!! gotta try it for Christmas gifts!!!
This is soooo cute!!! gotta try it for Christmas gifts!!!
I have looked at the two sites you provided, as well as done numerous searches, and am unable to find the “Magic Reindeer Food” image. Can you please advise me as to where to obtain this? Thanks.
Hi there! I bought this on Etsy, so I cannot share the photo to download but I CAN share the link to purchase 🙂 here it is! Let me know if you have any issues! https://www.etsy.com/transaction/1464753963
Thank you very much. Can’t wait to finish these trays up with this adorable images.