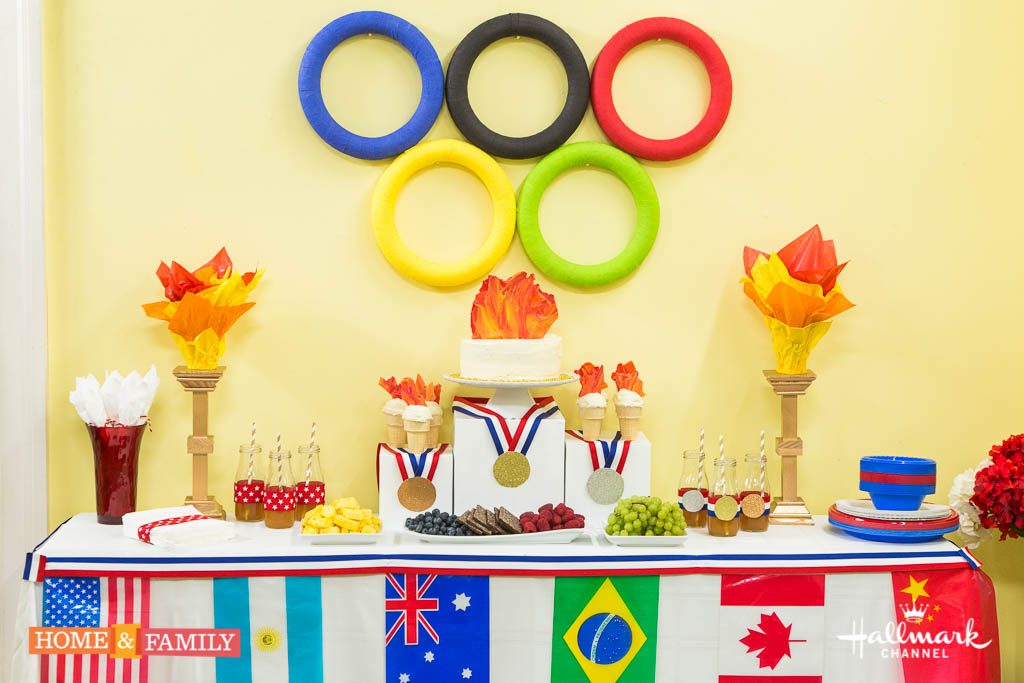
Olympic Tablescape DIY Decor
Olympic Tablescape DIY Decor
It is time for the summer Olympics!! Make sure to watch Home and Family on the Hallmark Channel TODAY, August 5, 2016 at 10 am! It will rerun on Monday August 8th at noon.
Olympic Rings
Supplies:
5 foam circles; we used 12 inch circles
Blue, Black, Red, Green, and Yellow Crepe Paper Streamers
Tape
Tacky Putty; optional
Directions:
Wrap the 5 different foam circles with the 5 different color streamers and secure with tape
Hang on the wall with a small hook, or hammer a small nail into the wall, and place the circle on the nail, in the traditional Olympic ring placement.
If you want them to be very secure, you can use a small amount of tacky putty on the back of the rings, against the wall
**NOTE: If you wish to keep the foam circles for future use, you can simply hang them next to each other on the wall. If you want them to intersect like the Olympic ring logo, then you can create the shape before wrapping the circles by cutting each ring with a serrated knife, and then gluing the rings together with a hot glue gun on its lowest temperature. Then, wrap the rings accordingly.**
Olympic Podiums
Large, medium, and small boxes; preferably white
White paint, if you cannot find white boxes
*Simply paint the boxes white, and place festive items on them
Olympic Torch
Supplies:
Wood candleholders; preferably square instead of rounded; if you can only find small candleholders, you can attach two together with wood glue to make one large torch
Foam Paper or Tissue Paper in orange, red, and yellow
2 Toilet paper holders
Glue Gun
Gold Spray Paint
Directions:
If using two small candleholders, glue them together with wood glue, and allow to dry
Spray the candle holders with gold spray paint in a well-ventilated area, on a covered surface, until it is evenly coated with the paint
Allow to dry
If using the foam paper, cut it into pieces that look like flames, and attach the pieces to the toilet paper holder with the hot glue gun
If using tissue paper, stuff the inside of the toilet paper holder with some tissue, and then use the glue gun to attach more tissue paper around the holder so that it looks like flames
Use a hot glue gun to attach the “flames” to the top of the gold candleholder to create the Olympic Torch
Olympic Medals
Supplies
Sparkly gold, silver, and bronze scrapbook paper
Red/white/blue ribbon
Hot glue gun
Scissors
Small bowl, or round object to trace a circle the desired size of the medal
Directions
Place a small bowl, or round object onto the back of the sparkly scrapbook paper, and trace with a circle
Cut the circle out with scissors
Cut the red/white/blue ribbon the desired length; around 24” is good for an adult, but you can figure out the measurement by wrapping the ribbon around yourself for the desired measurement
Cut the ribbon, and glue the ends together with a glue gun, placing one end on top of the other
Place some more glue at the end of the ribbons, and place the circle on the glue, sparkly side up, to create the medal to that can be worn around the neck, or on the table as décor
Torch Cupcakes
Vanilla Cupcakes
Ice cream cones with flat bottoms
White butter cream icing
Candy Coating Chocolate; red, orange, and yellow
Wax paper
Baking sheet
Directions:
Melt the chocolate in three separate bowls in a double boiler or microwave
Scoop the melted red chocolate onto the wax paper and spread around with the spatula
Top it with the melted orange chocolate and spread it around with the spatula
Then, place a scoop of the yellow chocolate into the orange chocolate and spread that around to create a fire look
Place it in the fridge to harden
Once it is hardened, use your hands to break into pieces to look like fire
Break the top of the muffin off, and place it into the ice cream cone, OR you can bake the cupcakes inside the ice-cream cones
Top the muffin with frosting
Place in a piece of the chocolate “fire”

